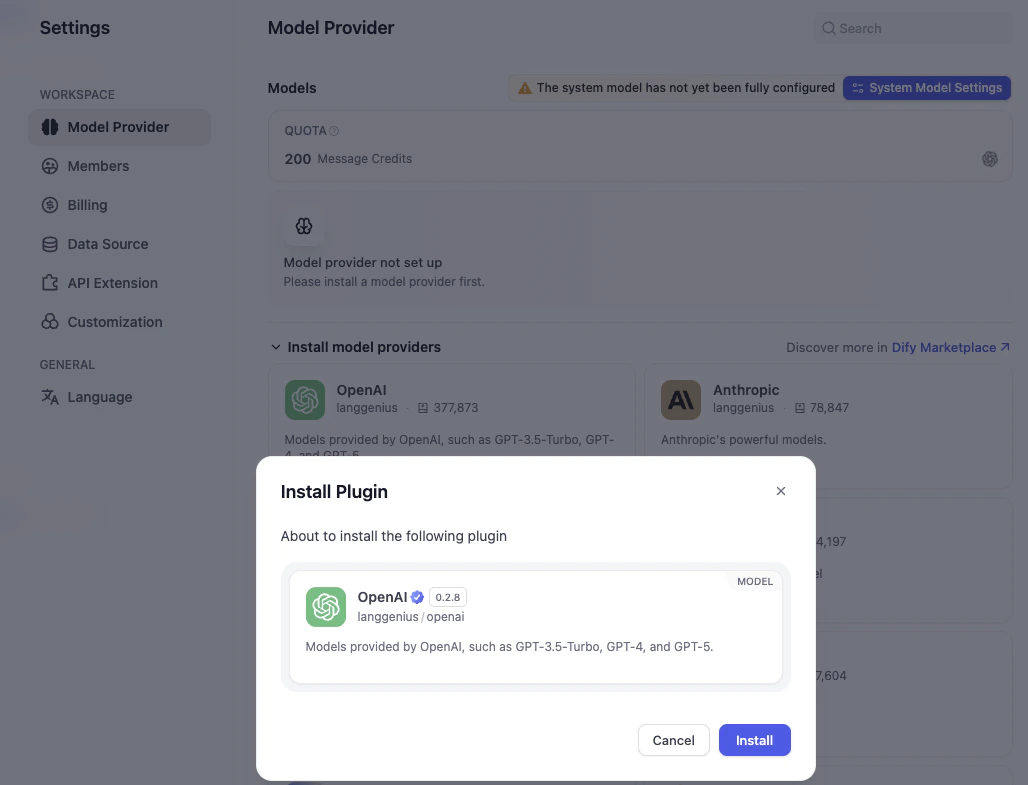
Configure the Model
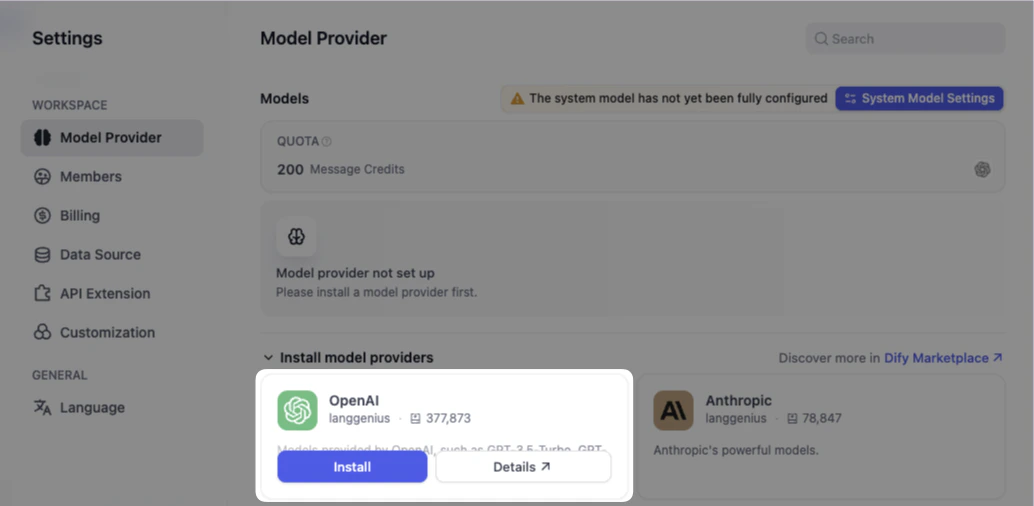
Before getting started, we need to connect to a model provider.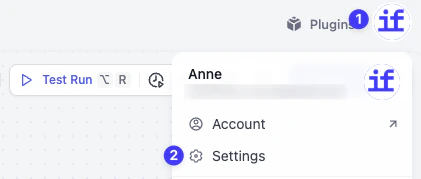
Understand the Tags
A pastry chef is great at cakes but terrible at sushi. Similarly, different AI models have different strengths. When selecting a model in Dify, you will see tags next to their names. Here’s how to read them so you can pick the right one for you.CHAT (The Conversationalist)
CHAT (The Conversationalist)
This is the bread and butter of AI. It’s best for:
- Dialogue
- Writing articles
- Summarizing text
- Answering questions
128K (The Great Memory)
128K (The Great Memory)
This number represents the Context Window. You can think of it as short-term memory.Here, K stands for thousand. 128K means the model can hold 128,000 tokens (roughly equals to a word or a syllable). The bigger the number is, the better its memory is.
If you need to analyze a massive PDF report or a whole book, you need a model with a big number here.
Multi-modal (The Evolved Senses)
Multi-modal (The Evolved Senses)
Modal just means Type of Information. Most early AI models could only read text. Multi-modal models are evolved—they have senses like eyes and ears.VISION (The Eyes)Models with this tag can do more than read; they can see! You can upload a photo of a sunset and ask, What colors are in this? or upload a picture of your fridge ingredients and ask, What can I cook with this?AUDIO (The Ears)Models with this tag can hear. You can upload an audio recording of a meeting or a lecture, and the model can transcribe it into text or write a summary for you.VIDEO (The Movie Analyst)These models can watch and understand video content. They can analyze what is happening in a video clip, just like a human watching a movie.DOCUMENT (The Reader)These models are expert readers. Instead of copying and pasting text, you can just upload a file (like a PDF or Word document). The model will read the file directly and answer questions based on what is written inside.
Hands-On 1: Add the LLM Node
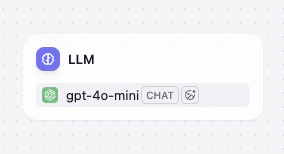
Let’s put the brain into our workflow.Add the Node
Right-click in the empty space between Start and Output node. Click on the new LLM block. In the right-side panel, look for Model. Select gpt-4o-mini.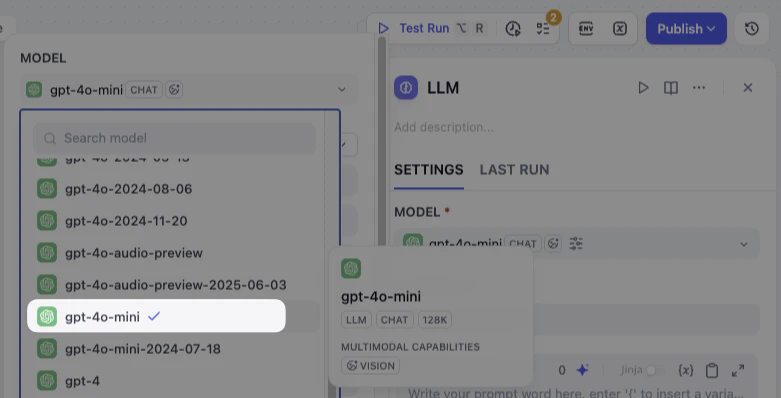

Key Concept: The Prompt (The Instructions)
What is a Prompt? Think of the Prompt as the specific note you attach to the order ticket. It tells the AI exactly what to do and how to do it. The most critical part is the ability to use Variables from the Start Node directly within your Prompt. This allows the AI to adapt its output based on the different raw materials you provide each time. In Dify, when you insert a variable likecustomer_name into the prompt, you are telling the AI: Go and look in the box labeled Customer Name and use the text inside.
Hands-On 2: Write the Prompt
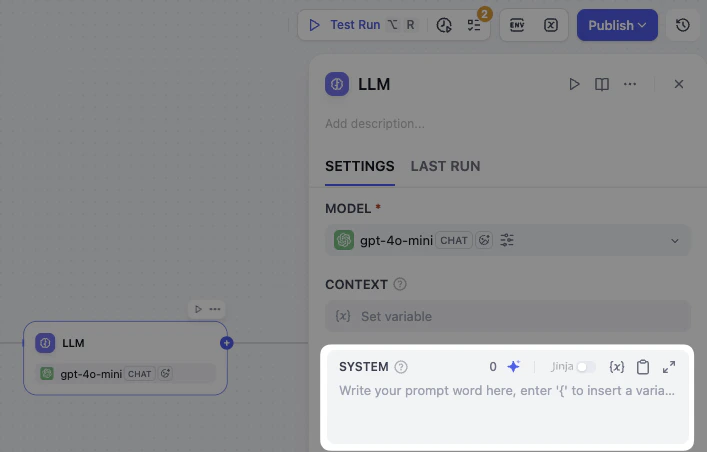
Now, let’s apply this. We are going to write a prompt that mixes instructions with our variables.Draft the Instructions
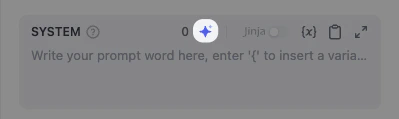
Click the LLM Node to open the panel and find the system box. System instructions set the rules for how the model should respond—its role, tone, and behavioral guidelines.Let’s start by writing out the instructions. You can copy and paste the text below.
Add User Messages
User messages are what you send to the model—a question, request, or task for the model to work on.In this workflow, the customer’s name and the email content change every single time. Instead of typing them out manually, we add Variables in user messages.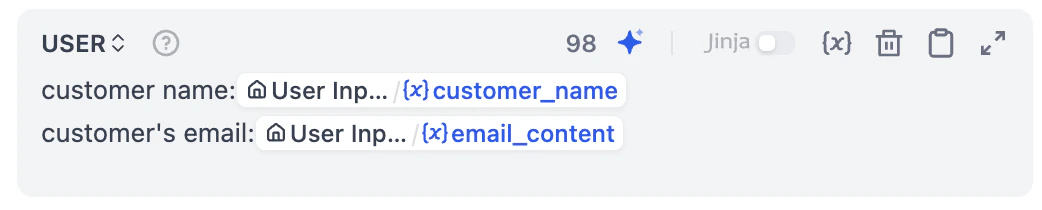
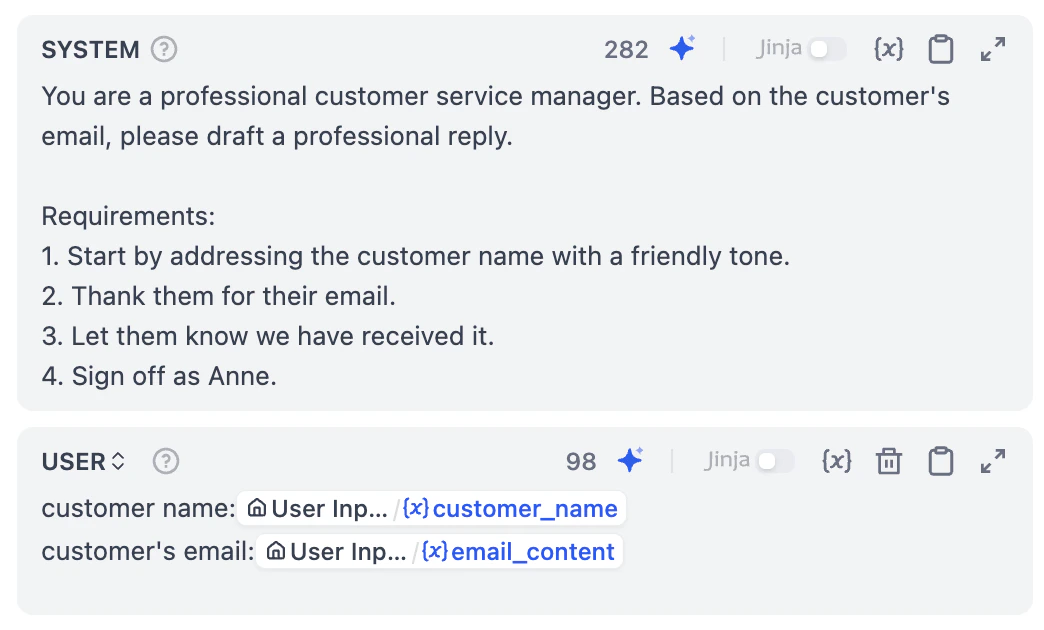
- Click Add Message button below system box.
- In the User Message box, type customer name:.
- Press
/on your keyboard. - The Variable Selection menu pops out, and click
customer_name. - Press Enter to start a new line, and type email content:. Then, Press the / key again and click on
email_content.
- Finally, your final Prompt will look like this:
Hooray! You’ve finished your first AI workflow in Dify!
Run and Test
The ingredients are prepared, the chef is stand-by, and the instructions are ready. But does the dish taste good? Before we serve it to the customer, let’s do a recipe testing. Testing is the secret sauce to a stable workflow. It helps us catch those sneaky little issues before they are put into work.Quick Concept: The Checklist
Think of the Checklist as your workflow’s personal Health Check Doctor. It monitors your work in real-time, automatically spotting incomplete settings or mistakes (like a node that isn’t connected to anything). Glancing at the Checklist before you hit Publish button is the best way to catch unnecessary errors early.Hands-On 3: Test & Debug
The Pre-flight Check
Look at the top right corner of your canvas. Do you see the Checklist icon with a little number 1 on it? This is Dify telling you: Wait a second! There’s one small thing missing here_._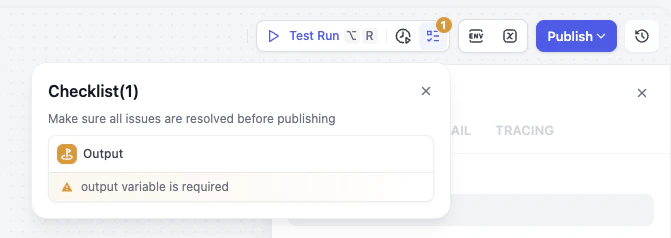
Analyze the Warning
Click on it, and you will see a warning: output variable is required. It means that the output node receives nothing.Imagine your Head Chef (the LLM) has finished cooking the food, but the Waiter (the Output Node) has empty hands.
Fix the Issue
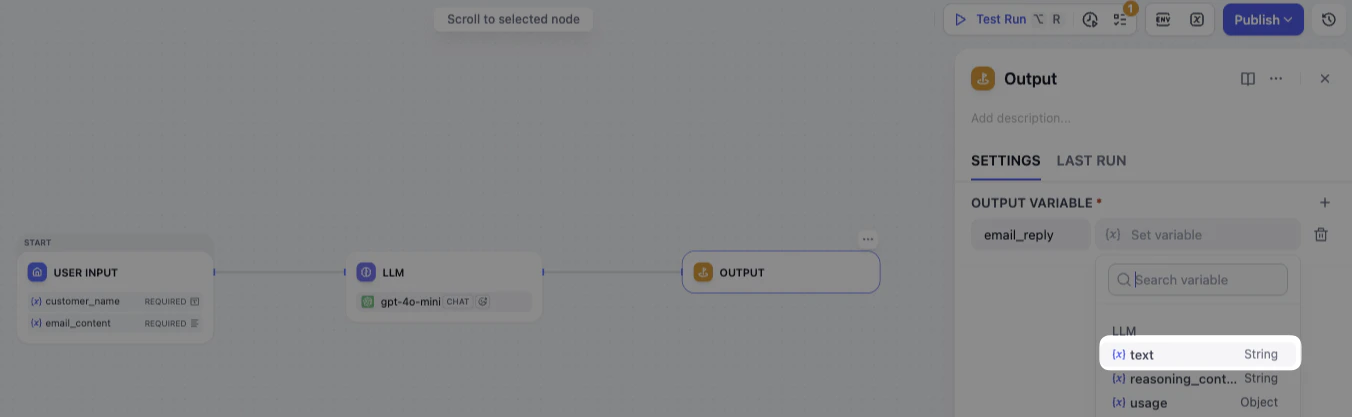
- Click on the Output Node
- Look for Output Variable and click the Plus (+) icon next to it
- Type
email_replyin the Variable Name field - Select the value: Click the variable selector and choose
{x} textfrom the LLM Node
Make a Test Run
Now, there’s no pop-up number on checklist. Let’s do a test run.Click Test Run at the top right corner of the canvas. Enter the customer’s name and the email, then click Start Run.
Great job!You didn’t just build a workflow, but also know how to use the checklist and check before it goes live.
Mini Challenge
Use the same structure to build a travel planner.Explore the Prompt Generator to help you craft better prompts!