

- Send requests to members in a personal chat with the bot.
- Let Dify read your organization’s user list and match each person to a member of your Dify workspace by email.
- Send members’ responses back to Dify when they click a button on a request.
Before You Start
Setting this up takes three kinds of Microsoft admin rights, often held by different people. Make sure you have, or can bring in:- For the bot: an Azure subscription where you can create resources.
- For the bot’s permissions: someone with the Privileged Role Administrator or Global Administrator role in Microsoft Entra ID, to grant admin consent.
- For the Teams app: someone with the Teams Administrator or Global Administrator role, to approve and install the app in the Teams admin center.
TRIGGER_URLis set to an HTTPS address Microsoft Teams can reach over the internet, so clicks on card buttons get back to Dify.CONSOLE_WEB_URLis set to an address members can open, since a request that arrives as a link message links there.
Create the Bot
1
Create the Azure Bot
-
In the Azure portal, create an Azure Bot. Fill in the Basics tab as you like, except for these:
- Data residency: Global.
- Pricing tier: Free is enough.
- Type of App: Single Tenant.
- Creation type: Create new Microsoft App ID.
- Click Review + create > Create.
2
Add the Teams channel
- When the deployment finishes, click Go to resource to open the bot.
- In Settings > Channels, under Available Channels, click Microsoft Teams.
- On the Messaging tab, choose Microsoft Teams Commercial (most common) and click Apply.
3
Note the bot's IDs
Open Settings > Configuration and note the Microsoft App ID and App Tenant ID. You’ll enter them in the Teams app and in Dify later.You can get back to the bot anytime from your Azure Bot list.
Grant Permissions and Create a Secret
1
Open the bot's app registration
In Microsoft Entra ID, open App registrations and select the one with the bot’s name.
2
Grant the permissions
- In API permissions, click Add a permission > Microsoft Graph > Application permissions, select
User.Read.AllandOrganization.Read.All, and click Add permissions. - Click Grant admin consent for … and confirm.
3
Create a client secret
- In Certificates & secrets > Client secrets, click New client secret, choose when it expires, and click Add.
- Copy the new secret’s Value before you leave the page. Microsoft won’t show it again. Make sure it’s the Value and not the Secret ID.
Mark the secret’s expiry date. Once it expires, Dify can no longer send requests to Teams or sync members.Create the next secret before then and enter it in Dify.
Create the Teams App
1
Create the app
In the Teams Developer Portal, click New app, give it a name, and click Create.
2
Fill in its basic information
- In Configure > Basic information, fill in the required fields, and in Application (client) ID, enter the Microsoft App ID you noted in Create the Bot.
- Click Save.
The App ID higher up on the page is the Teams app’s own ID. Leave it as it is.
3
Add the bot
- In Configure > App features, click Bot.
- Under Identify your bot, choose Enter a bot ID and enter the bot’s Microsoft App ID again.
- Under Select the scopes where people can use your bot, select Personal, and click Save.
4
Submit it for approval
Click Distribute > Publish to your organisation > Get started.
Approve and Install the App
1
Approve the app
- In the Teams admin center, open Manage apps, search for the app by its name, and open it.
- Click Publish and confirm.
2
Install it for members
- On the Users and groups tab, with Installs selected, click Install app.
- Set Install to to Everyone, or to Specific users or groups that cover everyone who should get requests, and click Apply.
Connect in Dify
-
In Dify, go to Settings > Channels, find Microsoft Teams, and click Connect.
If another IM (instant messaging app) is already connected, click Replace instead. Check what replacing clears first.
-
In App credentials, enter the IDs you noted in Create the Bot and the secret you copied:
- Tenant ID: the bot’s App Tenant ID.
- Client ID: the bot’s Microsoft App ID.
- Client Secret: the secret’s Value.
- Click Save and continue. Dify checks the connection before saving. If the check fails, see what its error means.
- In Configure callbacks, copy the Callback URL.
Set Up Callbacks
- In your Azure Bot list, open the bot and go to Settings > Configuration.
- Paste the Callback URL copied from Dify into Messaging endpoint and click Apply.
If
TRIGGER_URL changes later, the Callback URL changes with it.Open the Microsoft Teams settings in Channels to get the new one, and update the bot’s Messaging endpoint.Sync and Test
- In Channels, click Sync now to bind members’ IM identities. See Sync Members for what each result means. Dify matches people by the email address on their Microsoft Entra ID account. Anyone with no email there lands in Not matched. Bind them by hand in Contacts.
- Send yourself a test request. With your own IM identity bound, turn on Debug Mode in a workflow’s Human Input node, pick Microsoft Teams, and test-run the workflow. Use Debug Mode rather than Test message: a test message always arrives as a link message, so it can’t show whether cards and clicks work.
- If a link message arrives instead, the form has something a card can’t show.
- If nothing arrives or the run doesn’t continue, see Troubleshooting.
What Members See
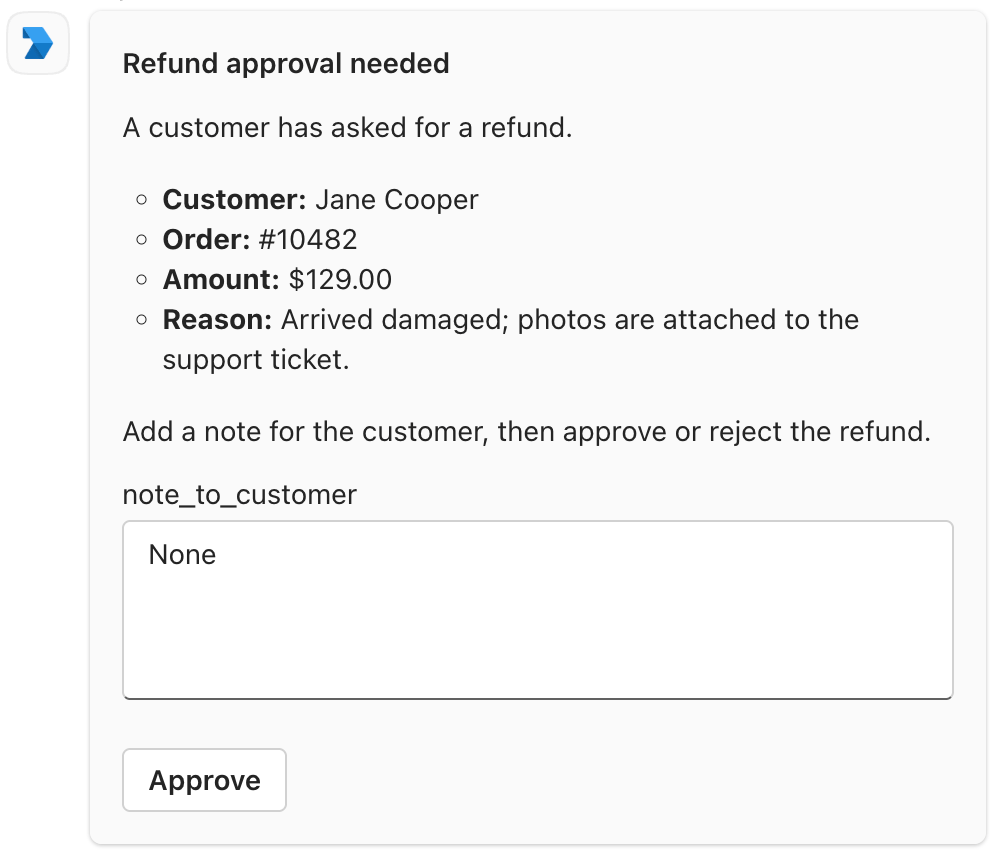
Request as a Teams Card

Request as a Link Message
- The card is headed by the node’s title. Give the node a title recipients will understand, such as Approve refund rather than Human Input 2.
- Members must fill in every field before they can submit the card.
- A file field (Single File or File List).
- Very long content, such as a long report inserted from a variable.
Troubleshooting
Saving in Dify fails
Saving in Dify fails
The error in the message points to the cause:
- AADSTS7000215: the Client Secret is wrong, often because the Secret ID was pasted instead of the Value. Enter the secret’s Value; if you no longer have it, create a new secret.
- AADSTS700016: the Client ID isn’t an app in the Tenant ID’s organization. Copy both IDs again from the bot’s Configuration page; the App ID from the Teams Developer Portal won’t work.
- HTTP status: 403: Dify isn’t allowed to read your user list. Check that the admin consent has been granted.
A test request fails
A test request fails
Something stops Dify from sending: Test message shows “Test failed. Check the channel configuration and try again.”, or a Debug Mode run fails with “No one can approve this step.”Check that:
- Your own IM identity is bound.
- The Teams app has reached you. If it isn’t installed for everyone in the Teams admin center, add it yourself in Teams from Apps > Built for your org.
- The bot’s Microsoft Teams channel is on, under Settings > Channels in Azure.
A member gets nothing in Teams
A member gets nothing in Teams
Check in Contacts that their IM identity is bound. If it isn’t, sync again or bind them by hand.If it is, the Teams app may not have reached them yet. They can add it themselves in Teams: Apps > Built for your org, then the app’s Add.Meanwhile, they still get the request by email if the deployment’s mail configuration is set up.
Requests stopped arriving, though Channels still shows Connected
Requests stopped arriving, though Channels still shows Connected
The client secret has probably expired. To check, open the Microsoft Teams settings in Channels, go back to App credentials, and click Test connection. An expired secret fails with AADSTS7000222.Create a new client secret and enter it under App credentials in the same settings. Members’ bindings and the Callback URL stay as they are, so there’s no need to sync again or update the Messaging endpoint.