

- Sends requests to members through its bot, each as a message with a link to the form in Dify.
- Lets Dify read the member directory and match each person to a workspace member by email.
Before You Start
Make sure that:- You can create internal apps in your DingTalk organization’s Developer Console.
CONSOLE_WEB_URLis set to an address members can open, since every request links there.
Create the App
In the DingTalk Developer Console, go to App Development > DingTalk App and click Create App. Give the app a name and a description, and click Save. Then:- In the app, open Add App Capability and click Add on the Bot card.
-
On the Bots page, turn on Bot Configuration, fill in the required fields, then click Publish.
- In Bot name, give the bot a name members will recognize, such as Dify: requests arrive from a bot with this name.
- Leave Message receiving mode as Stream mode.
-
In Manage permissions, set Contacts API permission scope to All employees. Then search for each of these permission codes and enable it:
qyapi_robot_sendmsgqyapi_get_department_listqyapi_get_department_memberqyapi_get_memberfieldEmail
- In Version Management and Release, click Create New Version, set Available scope to All employees, and click Save. If you’re not a DingTalk admin, your admin may need to approve it first. Wait until it’s published before you connect next.
Connect in Dify
-
In Settings > Channels, find DingTalk and click Connect.
If another IM (instant messaging app) is already connected, click Replace instead. Check what replacing clears first.
-
Enter the values from DingTalk:
- Corp ID: the CorpId on the Developer Console’s home page.
- Client ID and Client Secret: on your app’s Credentials and Basic Information page.
Whenever you change one of these values in DingTalk, update it in Dify too. - Click Connect. Dify checks the connection before saving.
Sync and Test
- In Channels, click Sync now to bind members’ IM identities. See Sync Members for what each result means.
-
With your own IM identity bound, send yourself a test request:
- For a quick check that messages reach you, use Test message in a Human Input node’s Message template: pick DingTalk as the Test channel and click Save and test. It sends you the message without running the workflow.
- To check the whole flow, turn on Debug Mode in the node, pick DingTalk, and test-run the workflow. When the message arrives in your chat with the bot, open the link, sign in, respond, and check that the run continues.
What Members See
Each request arrives in the member’s one-on-one chat with the bot. It’s a text message built from the node’s message template: the subject, then the body with the link.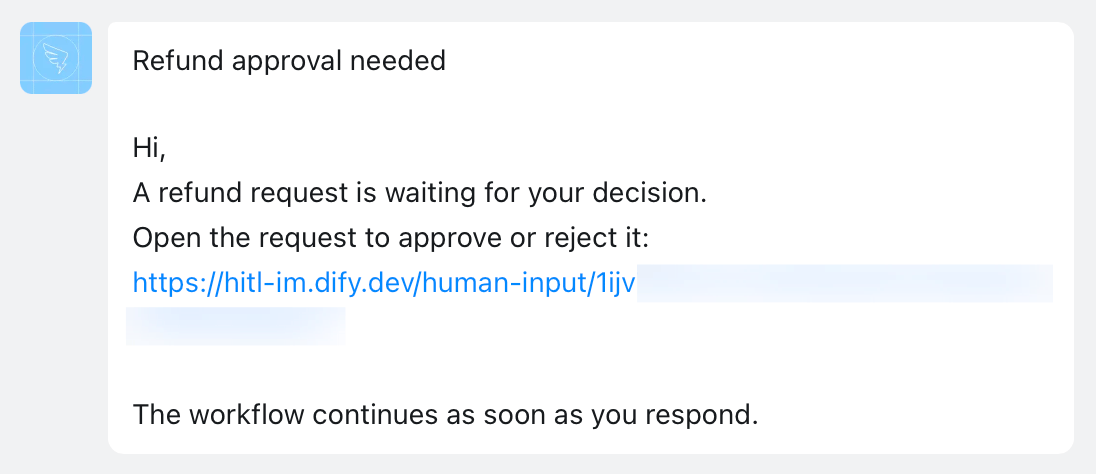
Request as a DingTalk Message
Troubleshooting
Connecting fails with API error code 88 or 60011
Connecting fails with API error code 88 or 60011
The app lacks
qyapi_get_department_list. Enable it in Manage permissions, then click Connect again.A sync says the provider directory could not be read
A sync says the provider directory could not be read
Usually the app lacks
qyapi_get_department_member. Enable it in Manage permissions and sync again.Members stay Not matched after a sync
Members stay Not matched after a sync
Dify found no matching email for them. Depending on who’s affected:
- Every member: the app lacks
fieldEmail. Enable it in Manage permissions and sync again. - Some members: Dify reads the email on each member’s DingTalk profile, not their DingTalk enterprise mailbox. For members who have only an enterprise mailbox, add an email to their profile and sync again, or bind them by hand.
A test request fails
A test request fails
Something stops Dify from sending: Test message shows “Test failed. Check the channel configuration and try again.”, or a Debug Mode run fails with “No one can approve this step.”Check that:
- The app has
qyapi_robot_sendmsgenabled. - The bot is published, and you published an app version after it.
- Your own IM identity is bound.