

本文档由 AI 自动翻译。如有任何不准确之处,请参考 英文原版。数据源插件于 Dify 1.9.0 引入,为知识库管道提供文档,是整个管道的起点。 本指南涵盖构建并发布数据源插件所需的插件架构、代码示例和调试方法。
前置条件
你应对知识库管道和插件开发有基本了解:数据源插件类型
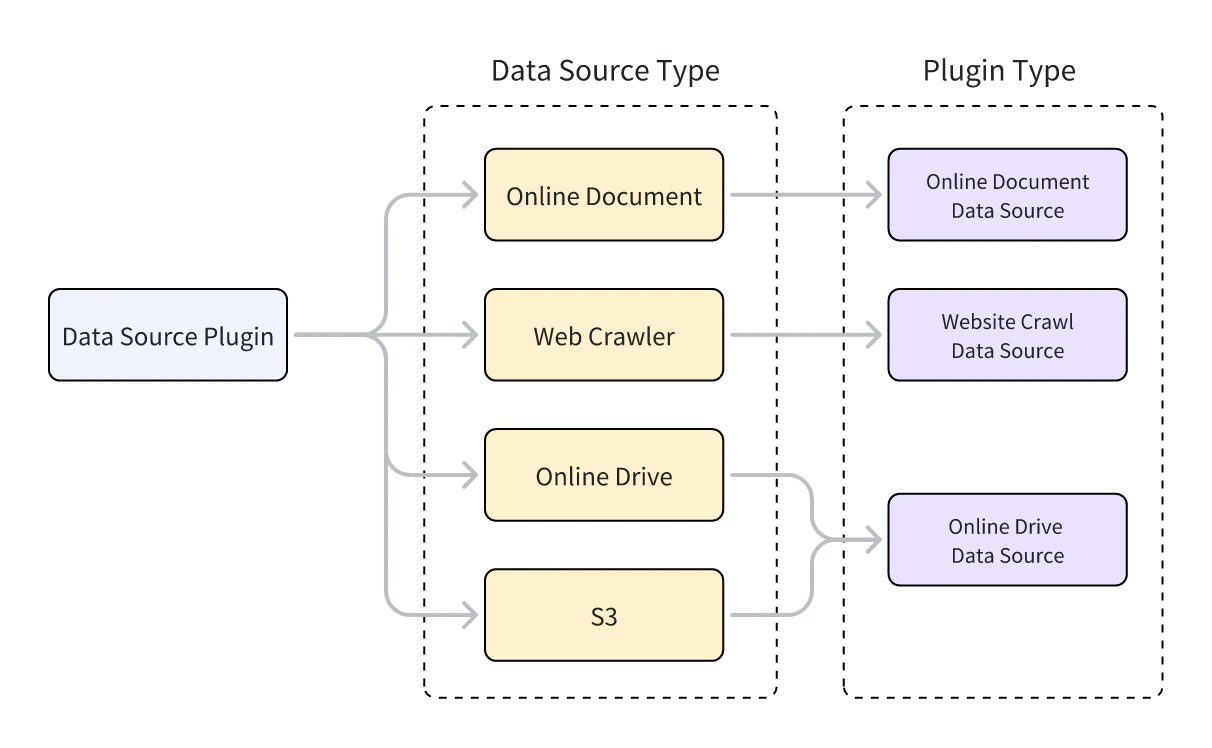
Dify 支持三种类型的数据源插件:网页爬虫、在线文档和在线云盘。每种类型对应不同的父类,实现插件功能的类必须继承自对应的父类。要了解如何通过继承父类来实现插件功能,参见 工具插件:准备工具代码。
- 网页爬虫:Jina Reader、FireCrawl
- 在线文档:Notion、Confluence、GitHub
- 在线云盘:OneDrive、Google Drive、Box、AWS S3、腾讯 COS
开发数据源插件
创建数据源插件
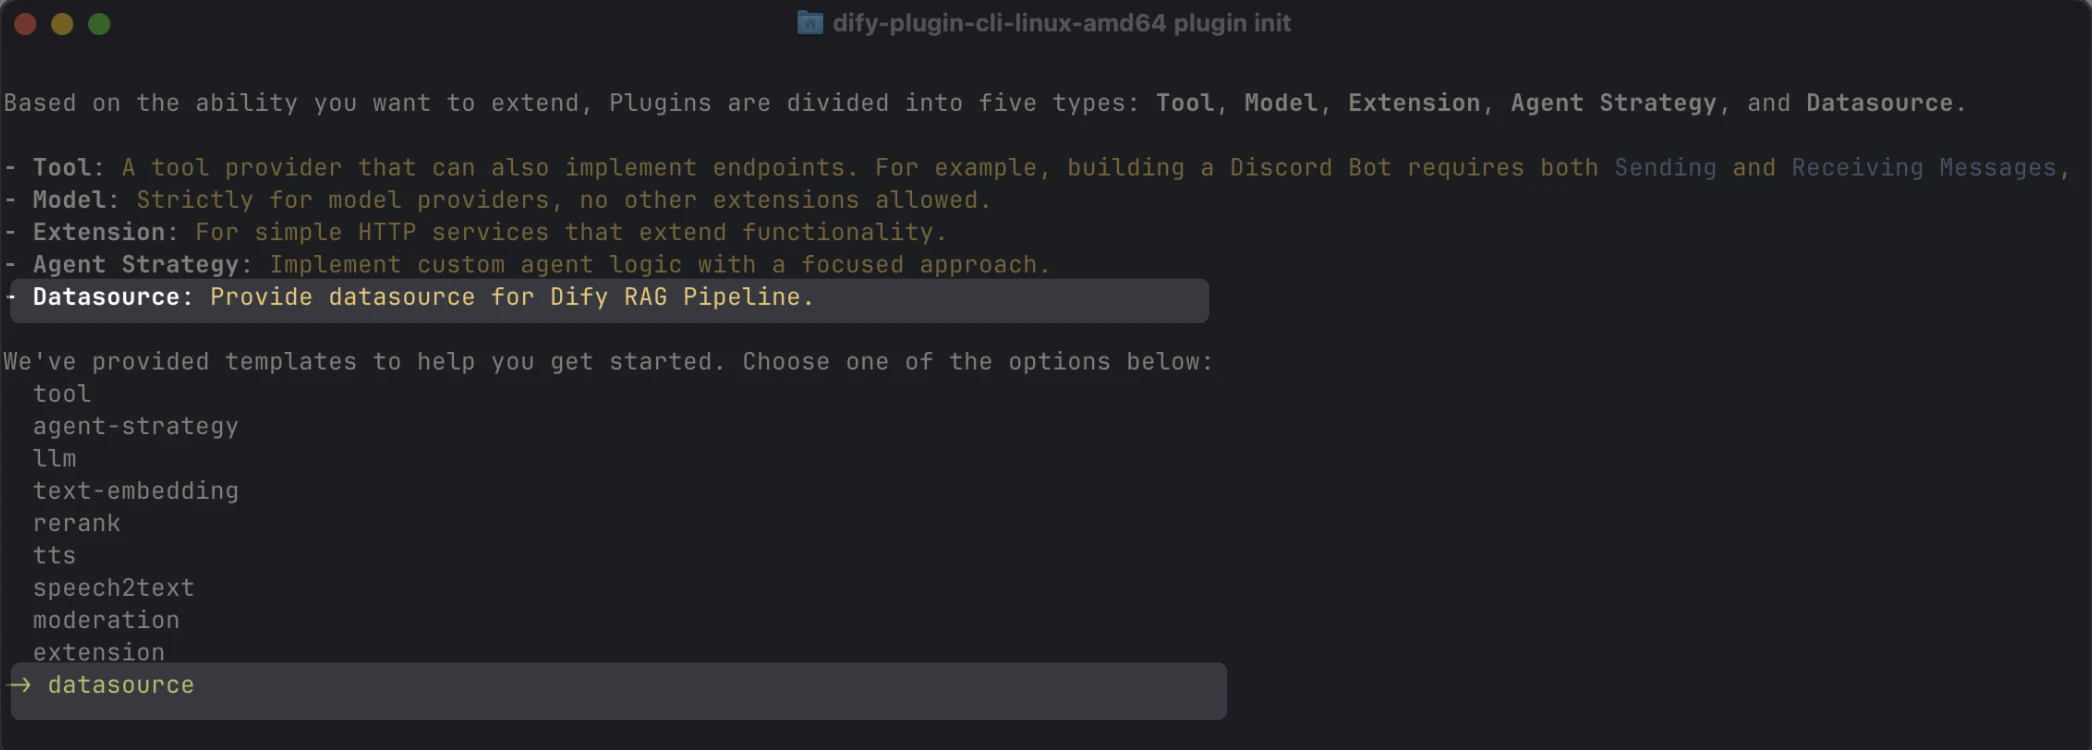
使用脚手架命令行工具,选择datasource 类型创建数据源插件。完成设置后,该工具会生成插件项目代码。
通常,数据源插件不需要使用 Dify 平台的其他功能,因此不需要额外的权限。
数据源插件结构
数据源插件由三个主要部分组成:manifest.yaml文件:描述插件的基本信息。provider目录:包含插件提供者的描述和认证实现代码。datasources目录:包含从数据源获取数据的描述和核心逻辑。
设置正确的版本和标签
-
在
manifest.yaml文件中,设置最低支持的 Dify 版本: -
在同一文件中,添加以下标签,使插件显示在 Dify 市场的数据源类别下:
-
在
requirements.txt文件中,设置插件 SDK 版本:
添加数据源提供者
创建提供者 YAML 文件
提供者 YAML 文件的内容与工具插件的基本相同,只有以下两点不同:有关创建提供者 YAML 文件的更多信息,参见 工具插件:完善第三方服务凭据。
数据源插件支持通过 OAuth 2.0 或 API Key 进行认证。要配置 OAuth,参见 为工具插件添加 OAuth 支持。
创建提供者代码文件
-
使用 API Key 认证时,提供者代码文件与工具插件相同,只需将提供者类的父类改为
DatasourceProvider。 -
使用 OAuth 认证时,数据源插件与工具插件略有不同:通过 OAuth 获取访问权限时,还可返回用于在前端显示的用户名和头像。因此,
_oauth_get_credentials和_oauth_refresh_credentials必须返回包含name、avatar_url、expires_at和credentials的DatasourceOAuthCredentials对象。DatasourceOAuthCredentials类定义如下:
_oauth_get_authorization_url、_oauth_get_credentials 和 _oauth_refresh_credentials 的函数签名如下:
- _oauth_get_credentials
- _oauth_refresh_credentials
添加数据源
三种数据源类型的 YAML 文件格式和数据源代码格式各不相同。网页爬虫
在网页爬虫数据源插件的提供者 YAML 文件中,output_schema 必须始终返回四个参数:source_url、content、title 和 description。
WebsiteCrawlDatasource 并实现 _get_website_crawl 方法,通过 create_crawl_message 方法返回爬取结果。
要爬取多个网页并分批返回,将 WebSiteInfo.status 设置为 processing,并对每批爬取的页面调用 create_crawl_message。所有页面爬取完成后,将 WebSiteInfo.status 设置为 completed。
在线文档
在线文档数据源插件的返回值必须至少包含一个content 字段来表示文档内容。例如:
OnlineDocumentDatasource 并实现两个方法:_get_pages 和 _get_content。
当用户运行插件时,它首先调用 _get_pages 方法获取文档列表。用户从列表中选择文档后,它再调用 _get_content 方法获取文档内容。
- _get_pages
- _get_content
在线云盘
在线云盘数据源插件返回文件,因此必须遵循以下规范:OnlineDriveDatasource 并实现两个方法:_browse_files 和 _download_file。
当用户运行插件时,它首先调用 _browse_files 获取文件列表。此时,prefix 为空,表示请求根目录的文件列表。该列表同时包含文件夹和文件条目。如果用户打开文件夹,会再次调用 _browse_files,此时 OnlineDriveBrowseFilesRequest 中的 prefix 即为用于检索该文件夹内文件列表的文件夹 ID。
用户选择文件后,插件使用 _download_file 方法和文件 ID 获取文件内容。你可以使用 _get_mime_type_from_filename 方法获取文件的 MIME 类型,使管道能够适当处理不同的文件类型。
当文件列表包含多个文件时,可将 OnlineDriveFileBucket.is_truncated 设置为 True,并将 OnlineDriveFileBucket.next_page_parameters 设置为获取下一页所需的参数,例如下一页的请求 ID 或 URL,具体取决于服务提供商。
- _browse_files
- _download_file
prefix、bucket 和 id 变量有特殊用途,可以在开发过程中根据需要灵活应用:
prefix:表示文件路径前缀。例如,prefix=container1/folder1/从container1存储桶的folder1文件夹中检索文件或文件列表。bucket:表示文件存储桶。例如,bucket=container1检索container1存储桶中的文件或文件列表。对于非标准 S3 协议的云盘,此字段可以留空。id:由于_download_file方法不使用prefix变量,因此完整文件路径必须包含在id中。例如,id=container1/folder1/file1.txt表示从container1存储桶的folder1文件夹中检索file1.txt文件。
调试插件
数据源插件支持两种调试方法:远程调试和将插件安装到本地。请注意以下事项:- 如果插件使用 OAuth 认证,远程调试的
redirect_uri与本地插件不同。请在服务提供商的 OAuth App 中相应更新相关配置。 - 虽然数据源插件支持单步调试,但我们仍建议在完整的知识库管道中测试它们,以确保完整功能。
最终检查
在打包和发布之前,请确保你已完成以下所有事项:- 将最低支持的 Dify 版本设置为
1.9.0。 - 将 SDK 版本设置为
dify-plugin>=0.5.0,<0.6.0。 - 编写
README.md和PRIVACY.md文件。 - 代码文件中仅包含英文内容。
- 将默认图标替换为数据源提供商的 logo。
打包和发布
在插件目录中,运行以下命令生成.difypkg 插件包:
- 在你的 Dify 环境中导入和使用插件。
- 通过提交 pull request 将插件发布到 Dify 市场。
有关插件发布流程,参见 发布插件。