

このドキュメントは AI によって自動翻訳されています。不正確な部分がある場合は、英語版 を参照してください。構築するすべての AI アプリはモデル上で動作します。Dify Cloud には人気のモデルが用意されており、さらに必要な場合は、独自のプロバイダーアカウントを接続できます。 モデルはワークスペース全体で共有されるため、チーム全員が同じモデルを使用します。
AI クレジットでモデルを使う
Dify Cloud はプランの AI クレジットで一連の人気プロバイダーのモデルを使えるため、自分の API キーがなくても始められます。 統合 > モデルプロバイダー(または Marketplace)からいずれかのプロバイダーをインストールすると、そのモデルを利用できます。AI の応答ごとに AI クレジットを消費します。 AI の応答とは 1 回のモデル呼び出し(1 回の入力と 1 回の出力)であり、消費する token 数に関係なく 1 回の応答としてカウントされます。1 回の応答に必要なクレジット数はモデルによって異なり、大きいモデルほど多く消費します。 どのプロバイダーが AI クレジットに対応しているか、および各モデルのクレジット消費量は、Dify 料金ページ を参照してください。対応プロバイダーで自分のアカウントを使う
より高いレート制限が必要な場合や、自分のプロバイダーアカウントで請求したい場合は、対応プロバイダーに自分の API キーを追加します。- 統合 > モデルプロバイダー で、まだインストールしていない場合はプロバイダーをインストールします。
- そのカードの セットアップ をクリックし、API キーとその他の必要な情報を入力します。Dify はプロバイダーを利用可能にする前にキーを検証します。
AI クレジット非対応のプロバイダーを接続する
AI クレジット非対応のプロバイダーを使うには、まずインストールし、自分のアカウントで実行します。AI クレジットはこれらのプロバイダーには適用されません。- 統合 > モデルプロバイダー で モデルプロバイダーをインストール を表示するか、Marketplace を開いて全一覧を確認します。
- プロバイダーをインストールし、セットアップ をクリックして、API キーとその他の必要な情報を入力します。
カスタムモデルを追加する
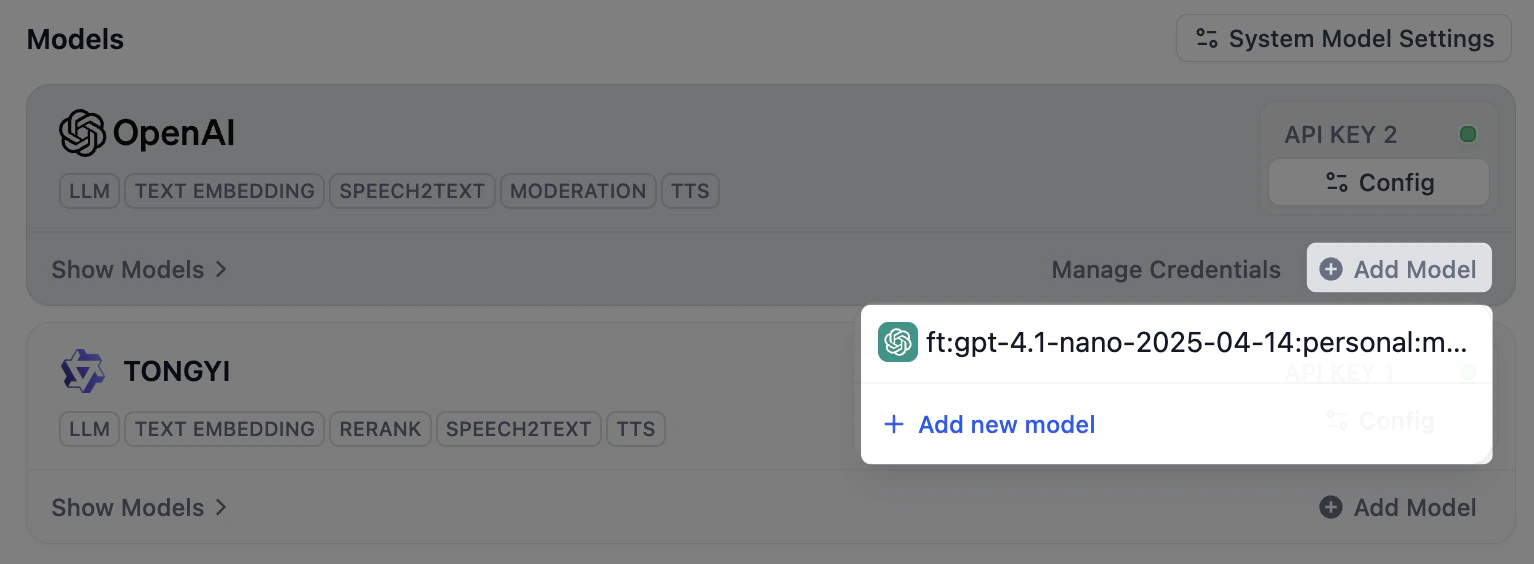
プロバイダーを接続すればそのモデルはすぐに利用できるため、モデルを手動で追加するのは、必要なモデルが一覧にない場合だけです。たとえば、新しくリリースされたモデルやファインチューニング済みモデルなどです。 プロバイダーカードの モデルを追加 をクリックし、モデル名と認証情報を指定します。固定されたモデルのみを提供するプロバイダーでは、このオプションは表示されません。既存のモデルと名前およびタイプが一致するモデルを追加すると、Dify は重複したモデルを作成する代わりに、その既存モデルに新しいキーを追加します。
キーを管理する
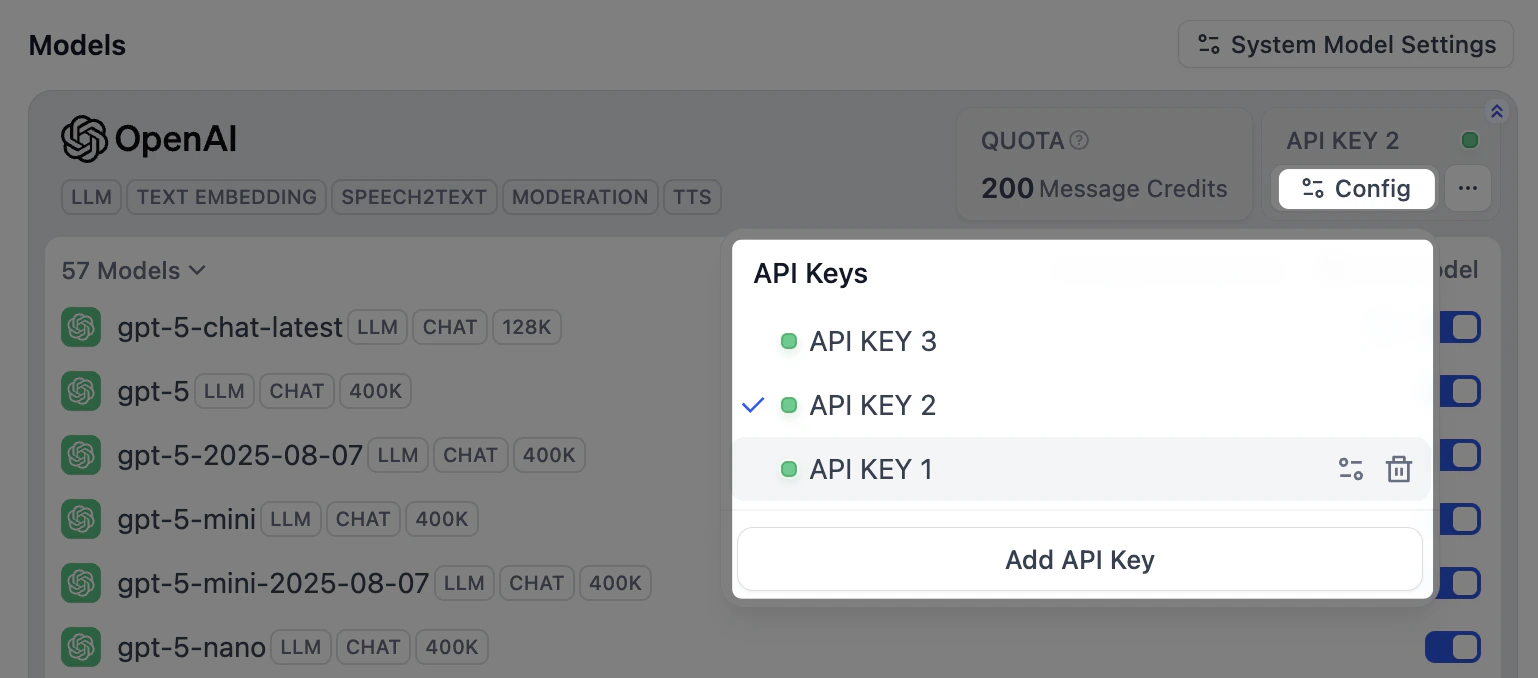
開発環境と本番環境を分けたい場合や、複数のアカウントに使用量を分散させたい場合は、1 つのプロバイダーに複数のキーを追加します。-
プロバイダー独自のモデルでは、そのカードの コンフィグ をクリックすると、モデルが共有するキーを管理できます。
-
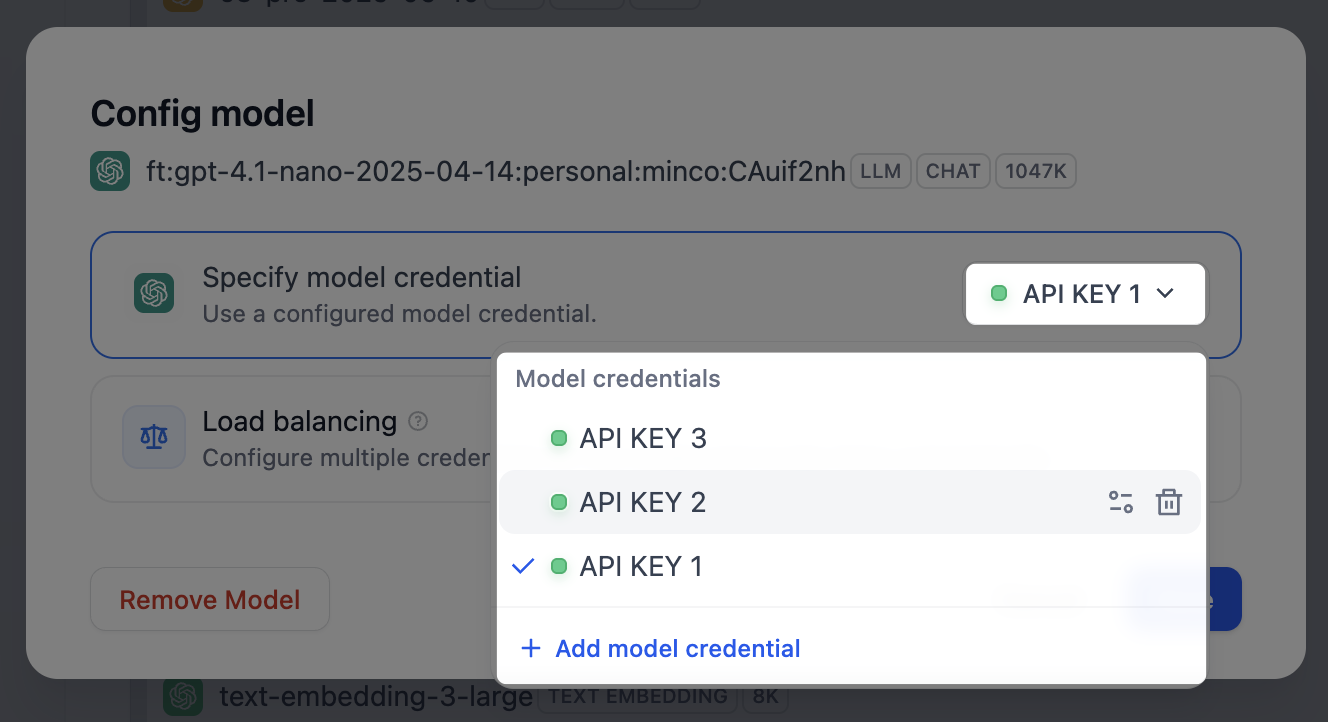
追加したカスタムモデルでは、そのモデルの コンフィグ をクリックすると、モデル固有のキーを管理できます。
すべてのカスタムモデルのキーを 1 か所で確認するには、プロバイダーカードの 認証情報を管理 をクリックします。

 モデルを削除してもキーはここに残るため、再入力せずにモデルを後で追加し直せます。
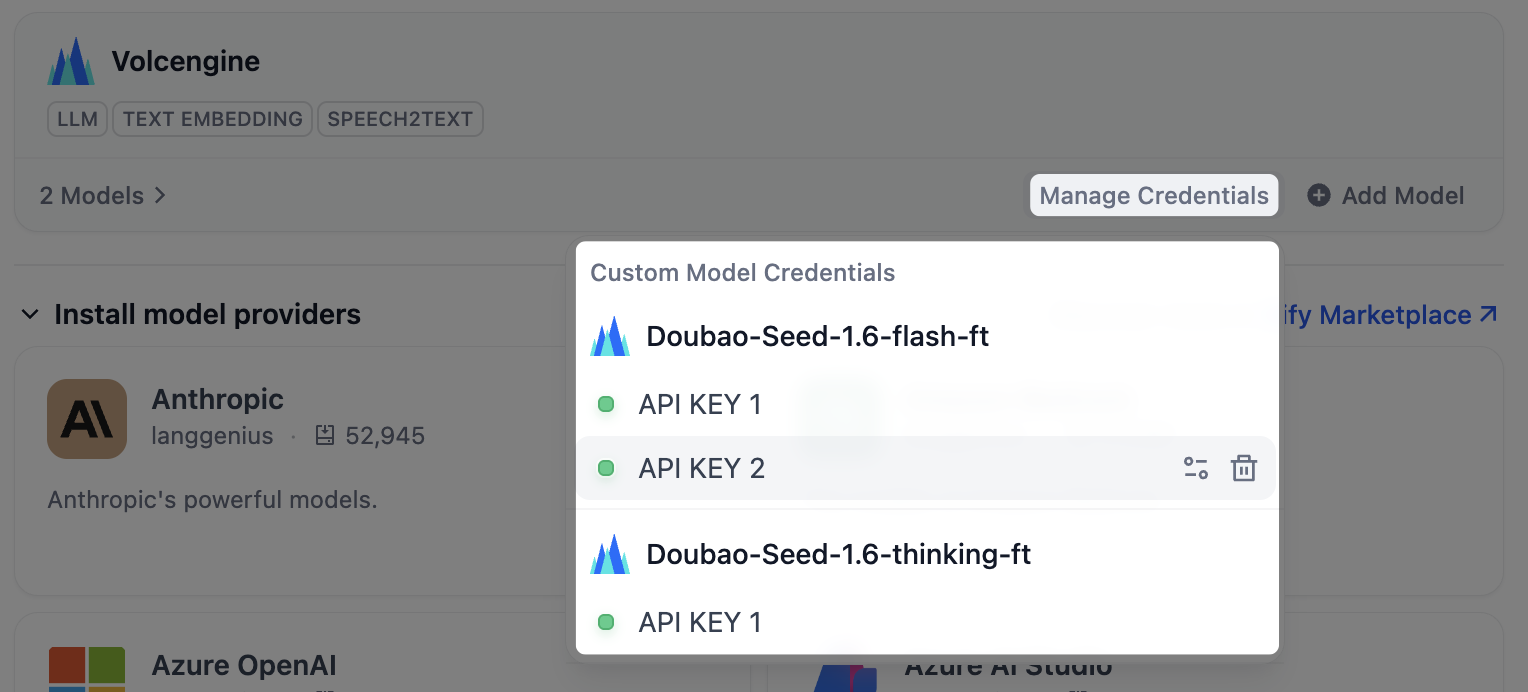
アプリがデフォルトで使うモデルを選ぶ
モデルを指定しないアプリやノードは、ワークスペースのデフォルトにフォールバックします。右上の デフォルトモデル をクリックし、タスクごとに設定します。- システム推論モデル:一般的な LLM タスクのデフォルトです。
- 埋め込みモデル:ナレッジベースの内容をインデックス化し、検索します。
- Rerank モデル:検索結果を関連度で並べ替えます。
- 音声-to-テキストモデル:音声をテキストに変換します。
- テキスト-to-音声モデル:テキストを音声に変換します。
負荷分散でリクエストを複数のキーに分散する Professional Team
1 つのキーが多数のリクエストを同時に処理すると、プロバイダーのレート制限に達し、失敗し始めることがあります。 負荷分散を使うと、同じモデルへのリクエストを複数のキーに分散でき、どの単一キーもボトルネックになりません。Dify はキーを順番にローテーションし、制限に達したキーは 1 分間休ませてから再試行します。- 一覧で対象のモデルを探し、コンフィグ をクリックして 負荷分散 を選択します。
-
認証情報を追加 をクリックし、キーをプールに追加します。
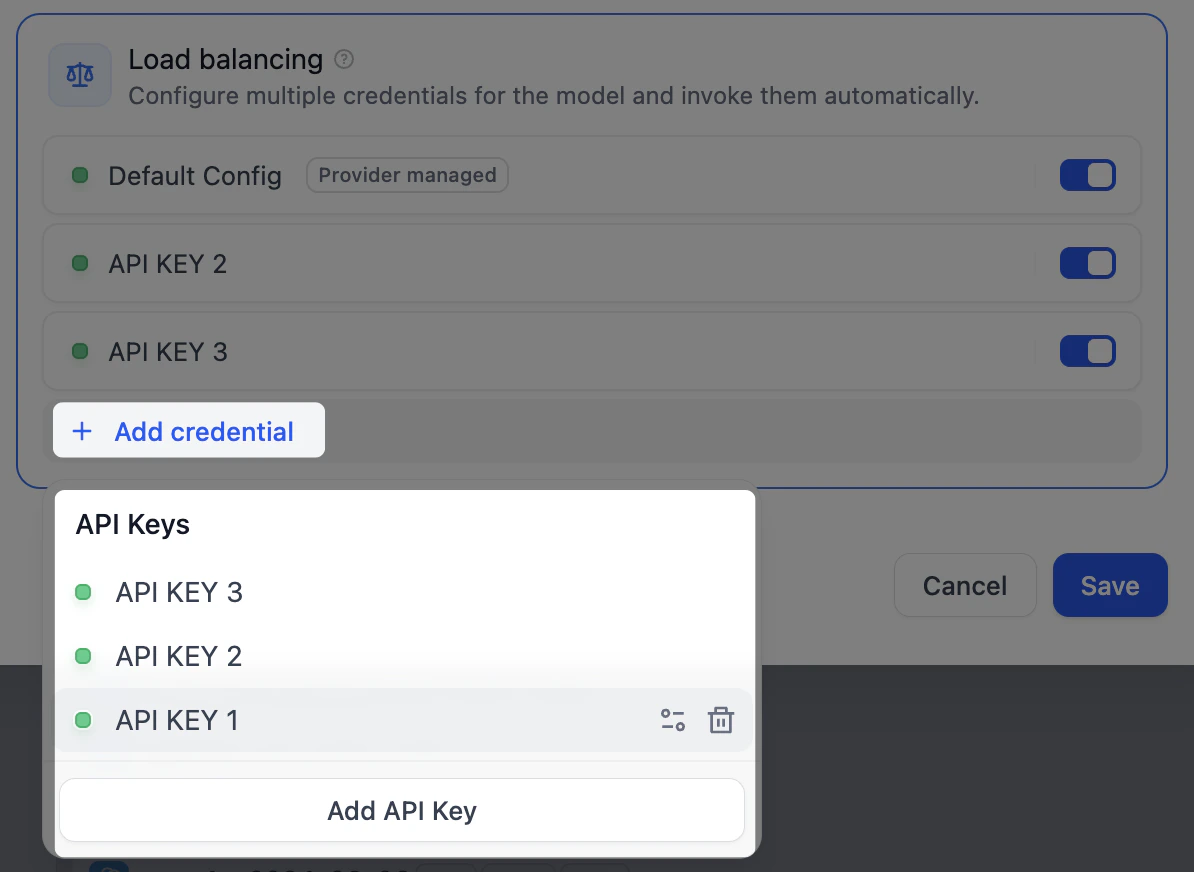
- 少なくとも 2 つのキーを有効にし、保存 をクリックします。負荷分散を使うモデルには、一覧にマークが表示されます。
いつでも単一のキーに戻せます。負荷分散の設定は、後で使えるように保持されます。