

Best Practice
One-Click Connection to Zapier and Automated Email Sending
This article will help you:
This guide walks you through installing the MCP SSE plugin in your Dify workspace and configuring it to connect with Zapier’s MCP service for seamless automated email workflows.


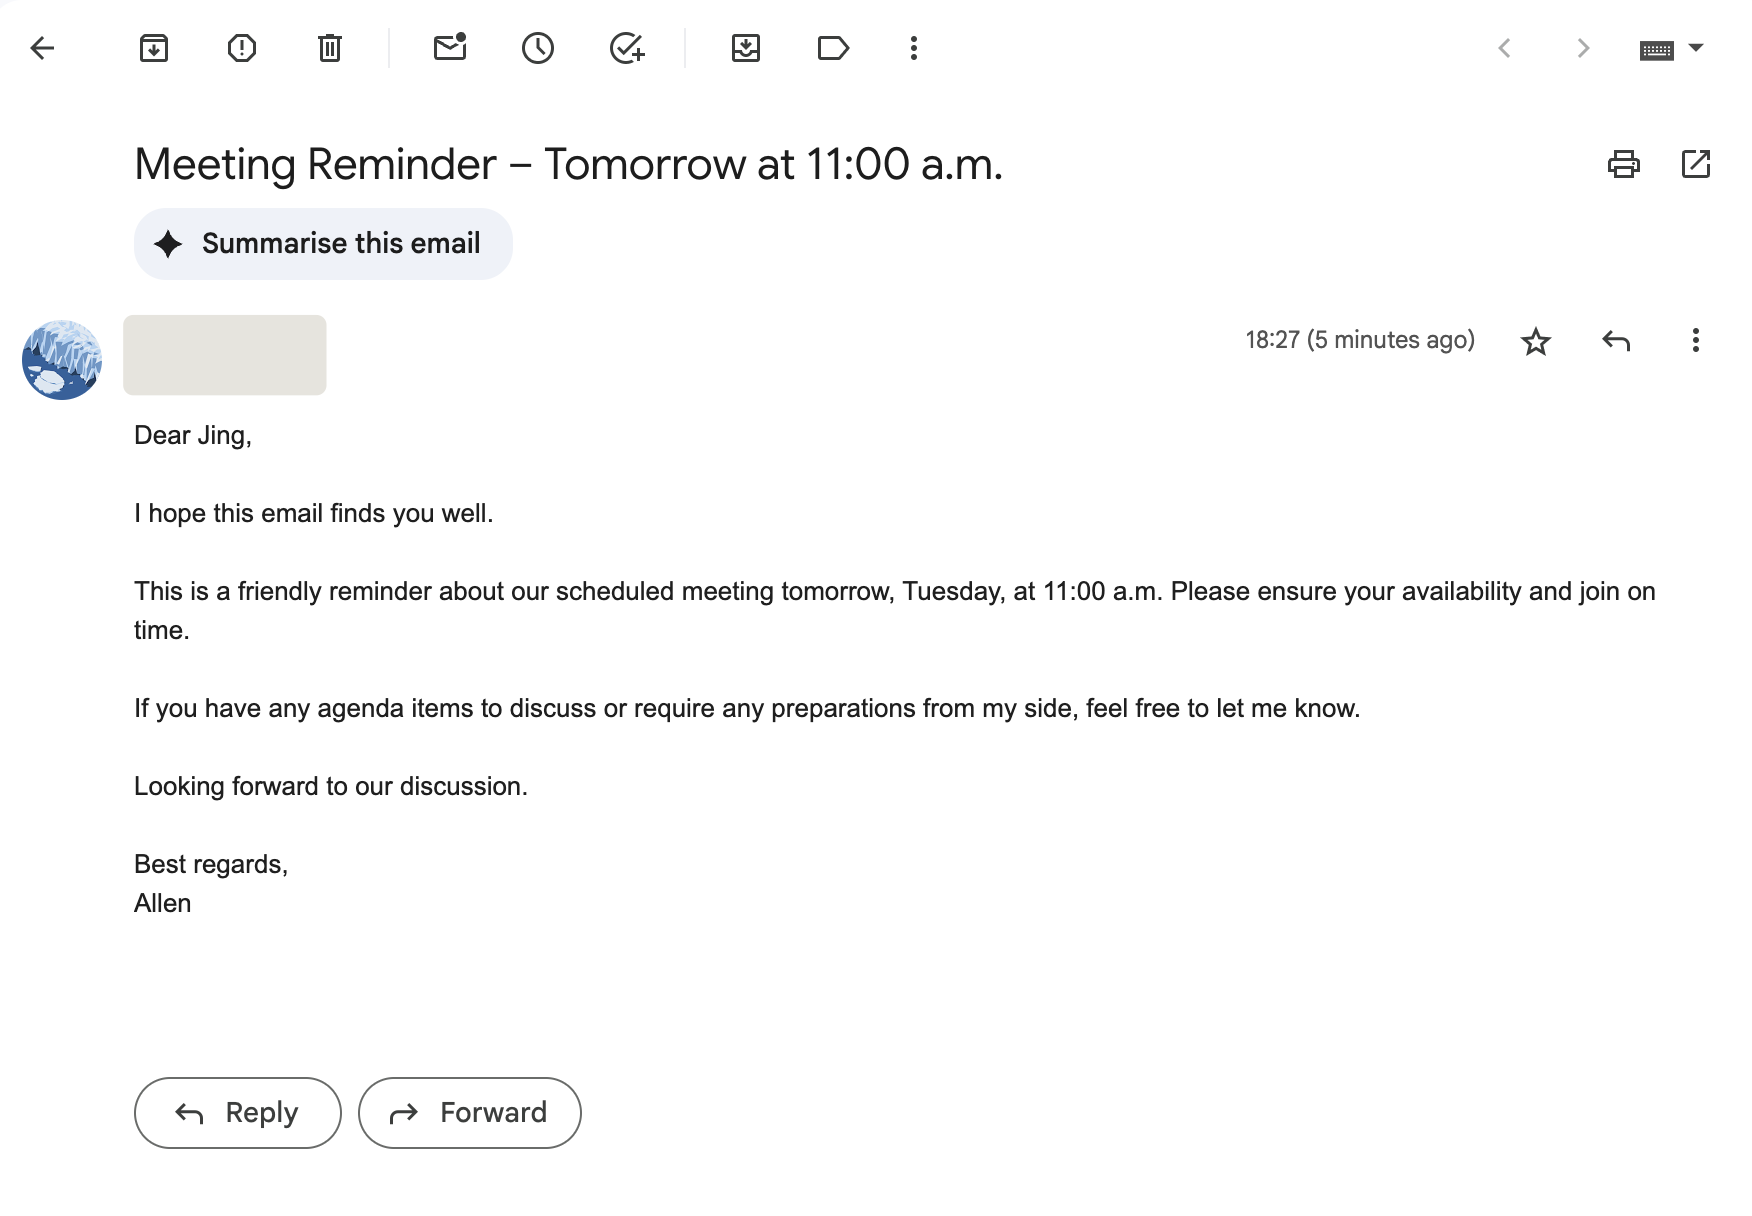
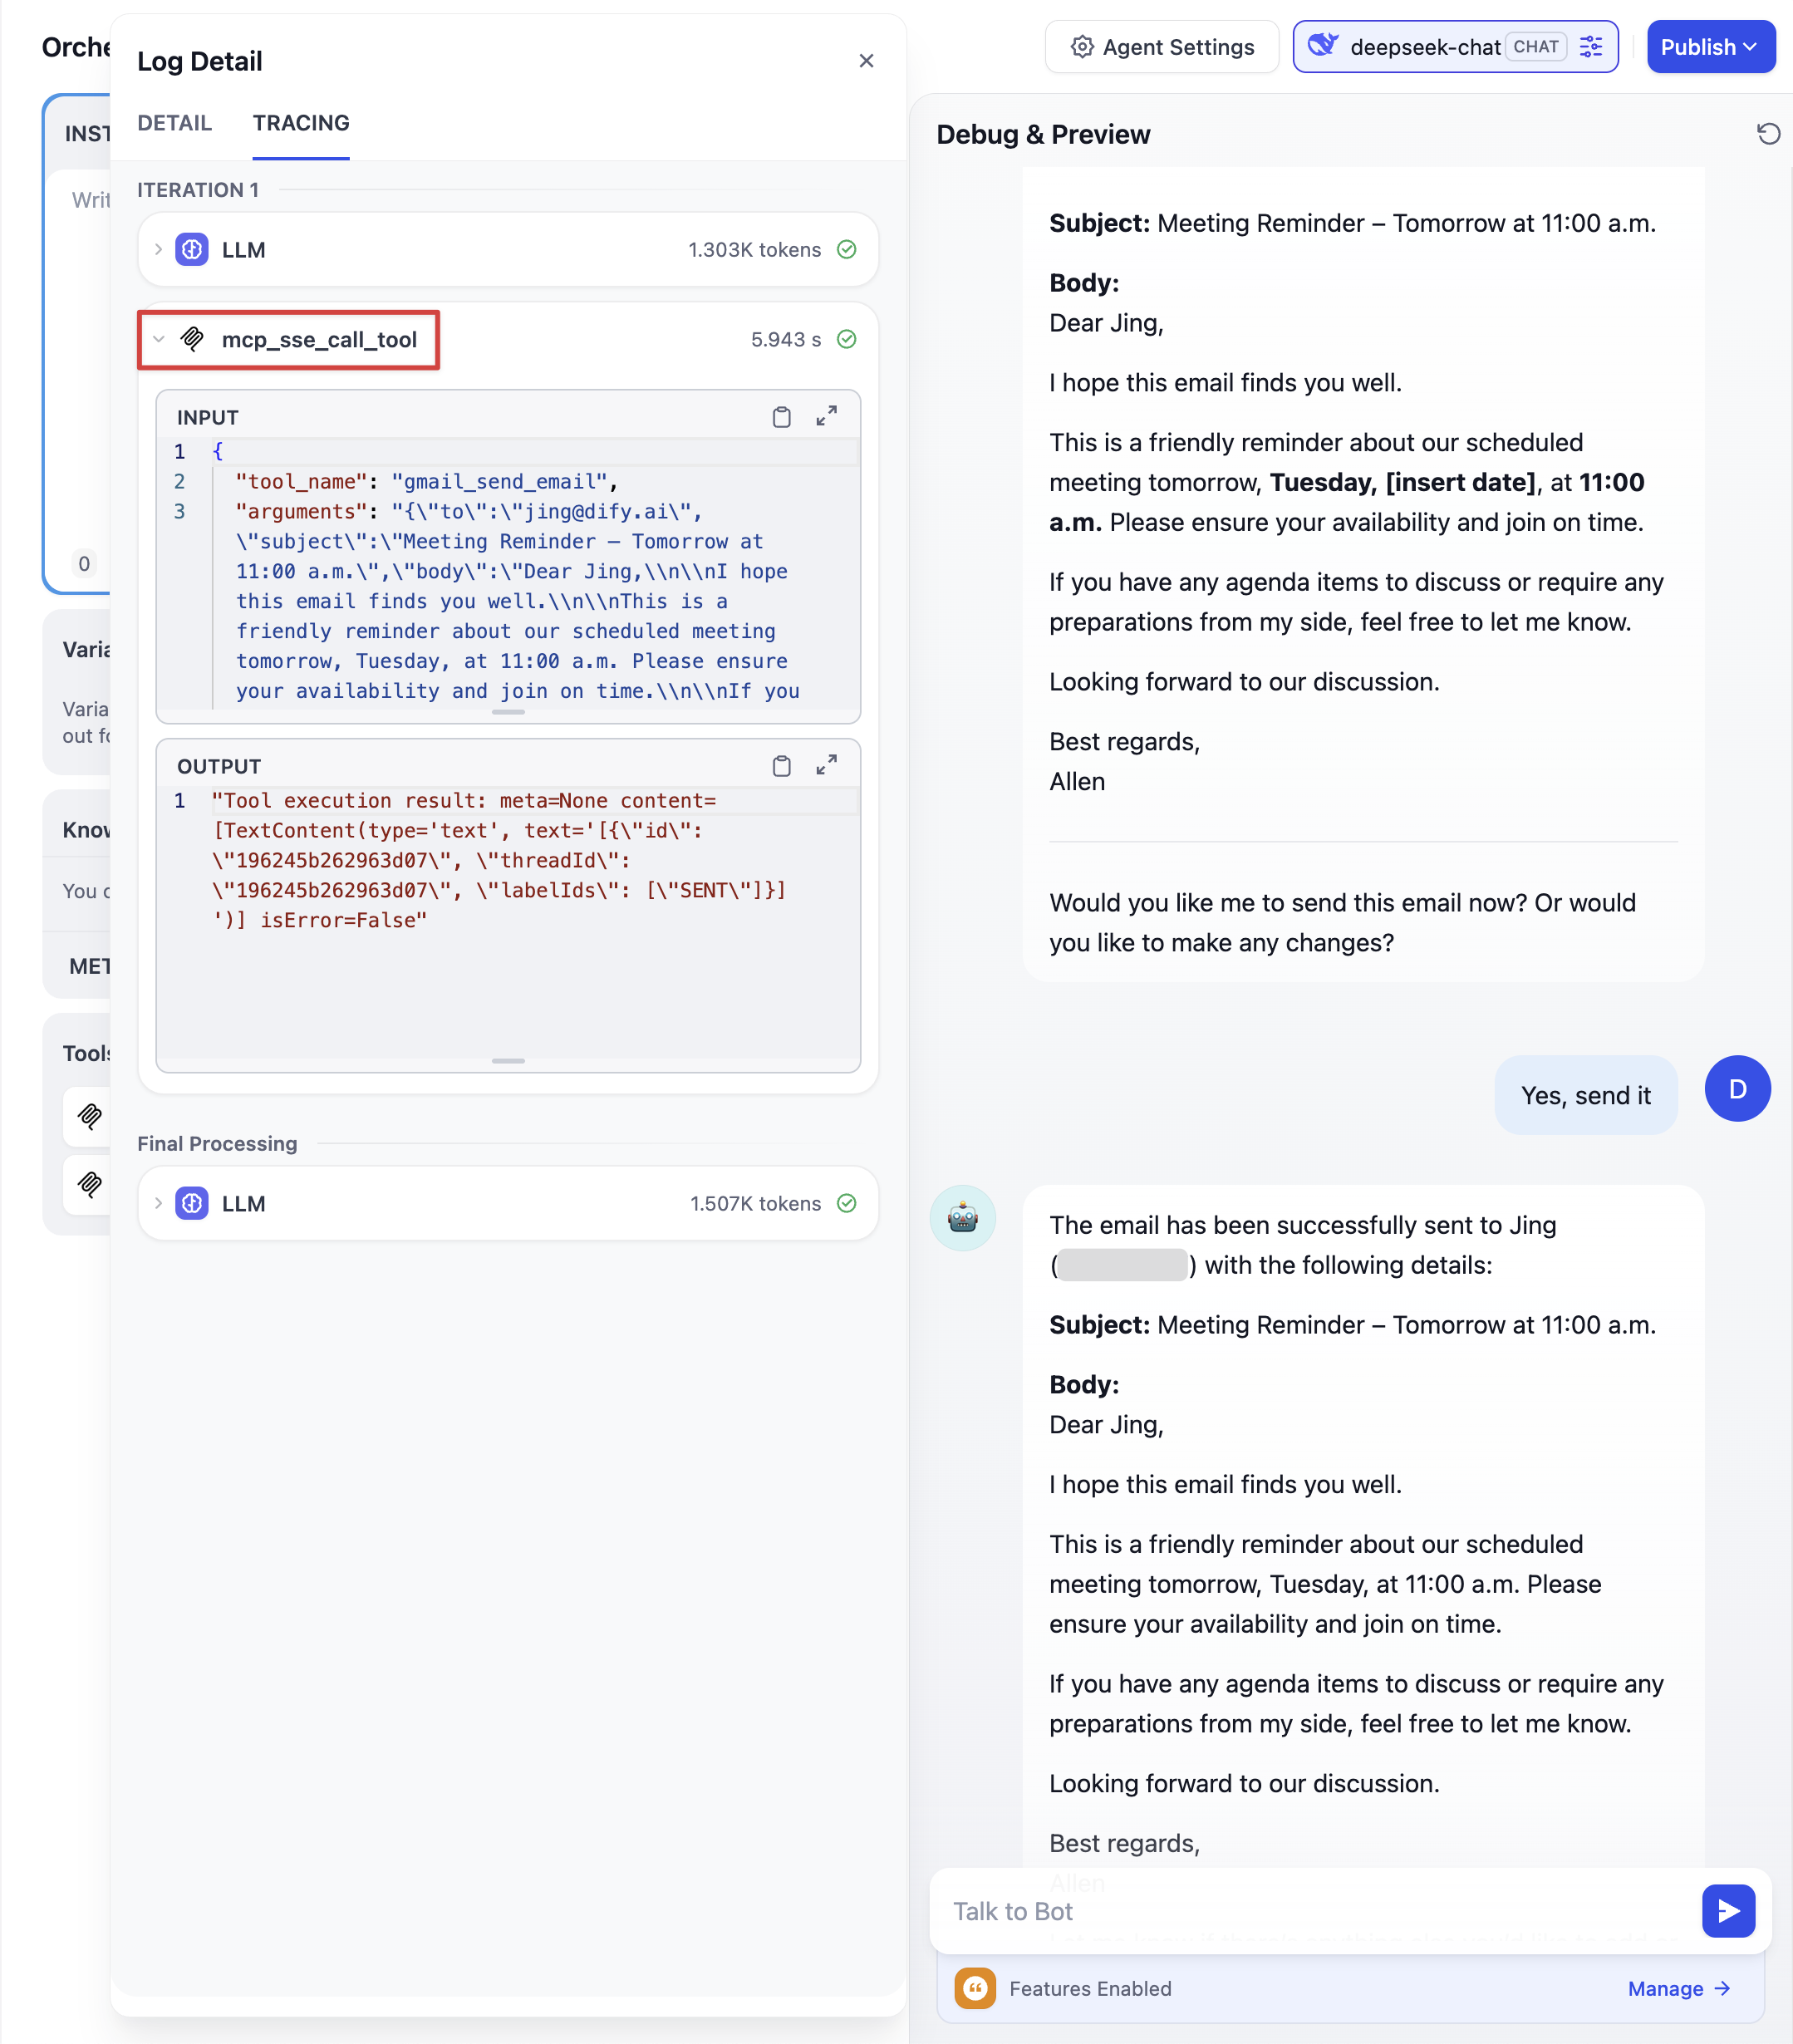 Simply instruct the Agent via chat to send an email, and it will handle the task using the configured MCP service. After the MCP finishes running, the email will be automatically sent to the recipient.
 Use the following JSON structure as a template, replacing the
 Once configured, when the Workflow runs to that Agent node, it can execute tasks using the configured Zapier MCP Server according to the Prompt instructions. As shown below, calling Gmail to send an email:

Edit this page | Report an issue
Background
Anthropic introduced the Model Context Protocol (MCP) in late 2024. As an emerging open protocol, MCP builds a bidirectional communication channel between LLMs and external applications, functioning like a “USB-C” interface for AI, helping models discover, understand, and safely call various external tools or APIs. In other words, developers no longer need to build complex custom integrations for each external service. Users can experience AI’s ability to easily call a vast array of third-party applications, whether processing daily office tasks, analyzing data, or executing marketing automation. AI is moving from “intelligent conversation” to “efficient action.” In the Dify community, MCP has garnered significant attention. Community developers have contributed multiple MCP plugins to the plugin marketplace, allowing you to easily connect external MCP services to Dify Agent applications or workflows. This article will use the MCP SSE plugin as an example to detail how to use MCP plugins within Dify to connect to Zapier and complete an automated email sending process.Prerequisites
- Dify Cloud version / Dify Community version ≥ v1.0.0
- Zapier account
Initializing Zapier MCP Service in Dify
Zapier’s MCP Server packages its existing 7000+ applications and 30,000+ actions into a single MCP Server URL. You can select and configure the tools and actions you need in the Zapier backend, such as sending emails, creating records in CRM, sending notifications in Slack, etc. Simply enter the MCP Server URL into the Dify MCP plugin configuration, and the LLM can automatically call these tools to complete various tasks during conversations or processes.Step 1: Request a Zapier MCP Server URL
- Visit the Zapier MCP Settings page.
- Obtain the MCP Server URL, which will be entered into the Dify plugin configuration later.
- Click “Edit MCP Actions” below the URL to enter the tools and actions addition page.
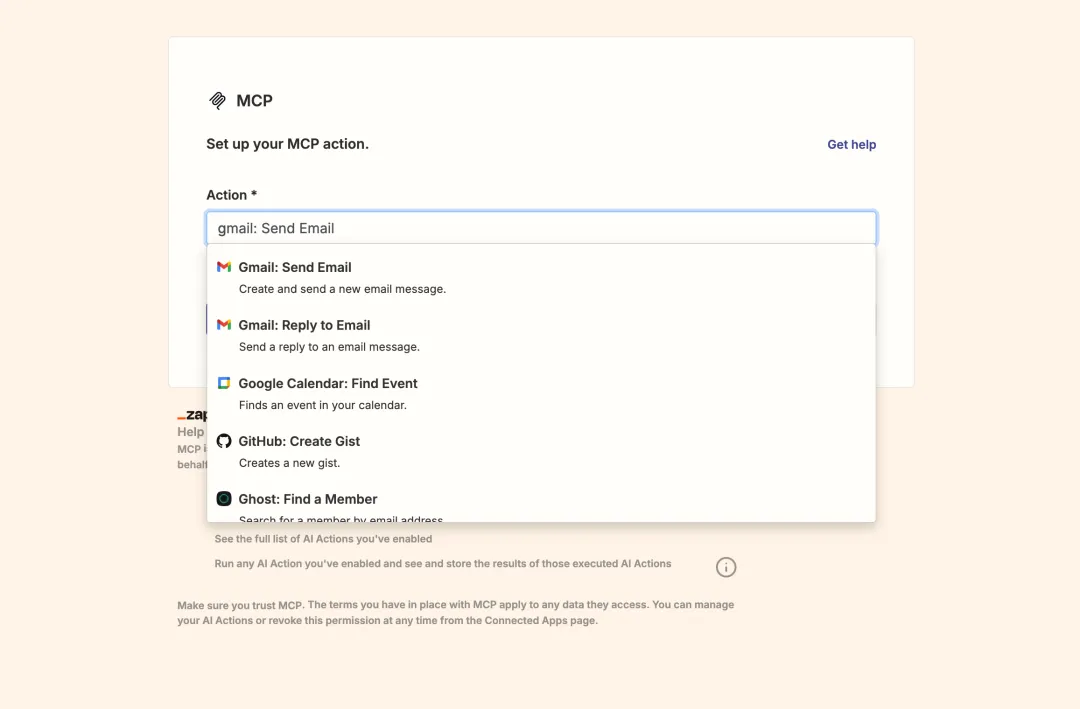
- Click Add a new action, then search for Gmail: Send Email.
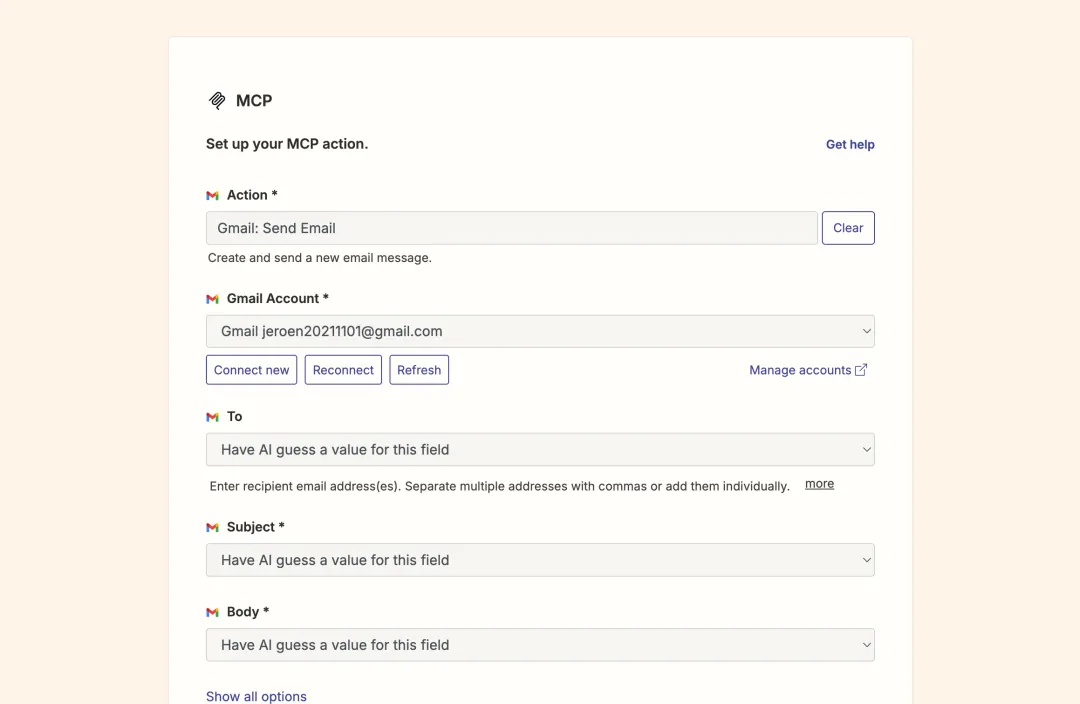
- Taking “Send Email” as an example:
- After completing the setup, you can continue to add different Actions to enrich the Agent’s available toolkit.
Step 2: Install the MCP SSE Plugin
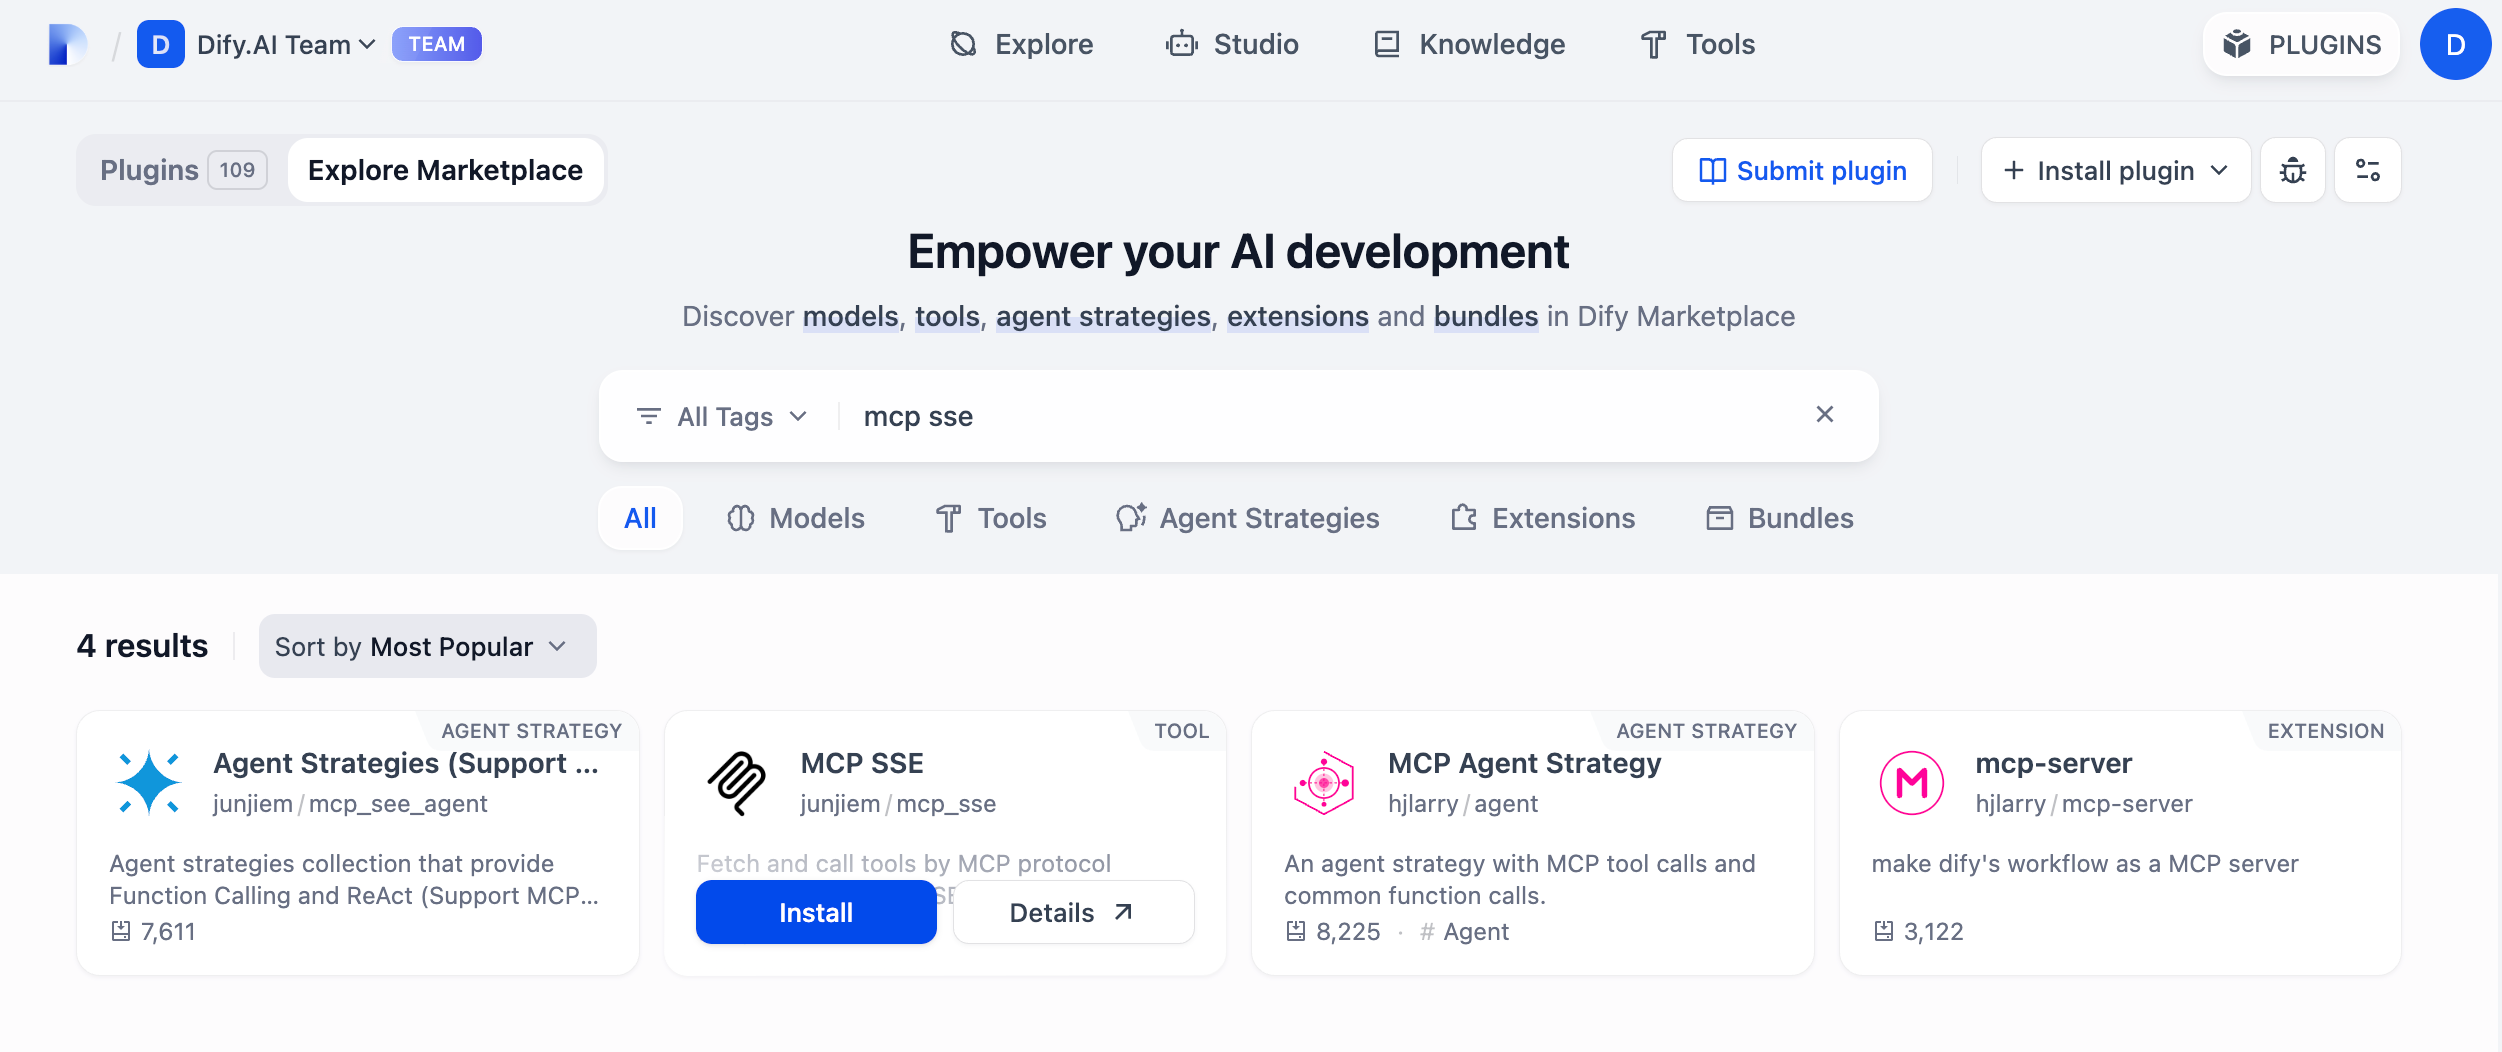
- Go to the Dify plugin marketplace, search for the MCP SSE plugin and click install.
For optimal stability, we recommend using plugin version v0.0.4. You can change the version in the plugin’s detail settings.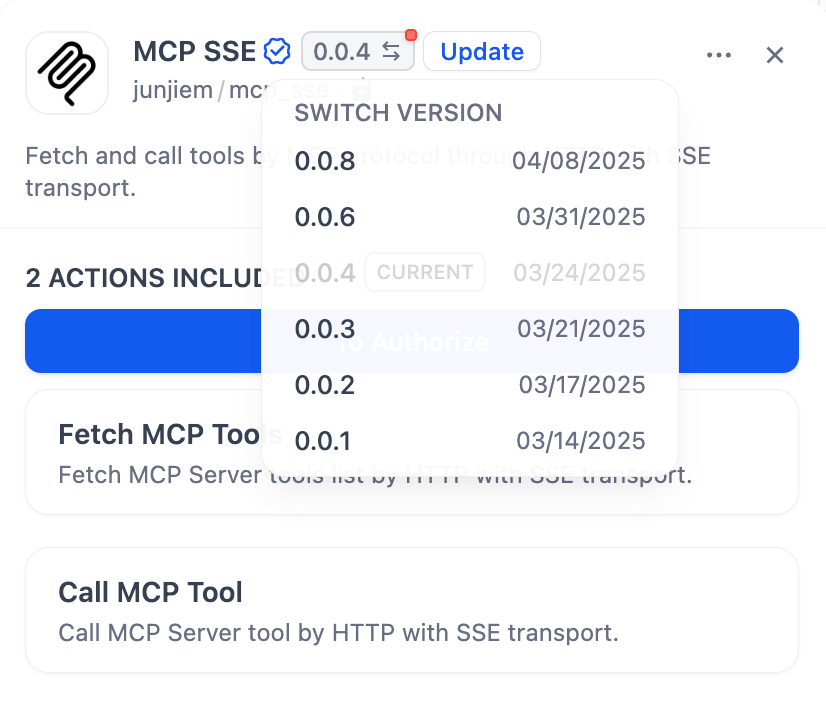
- Click the To Authorize button on the plugin page, and paste the Zapier MCP Server URL obtained earlier into the plugin. Reference address format:
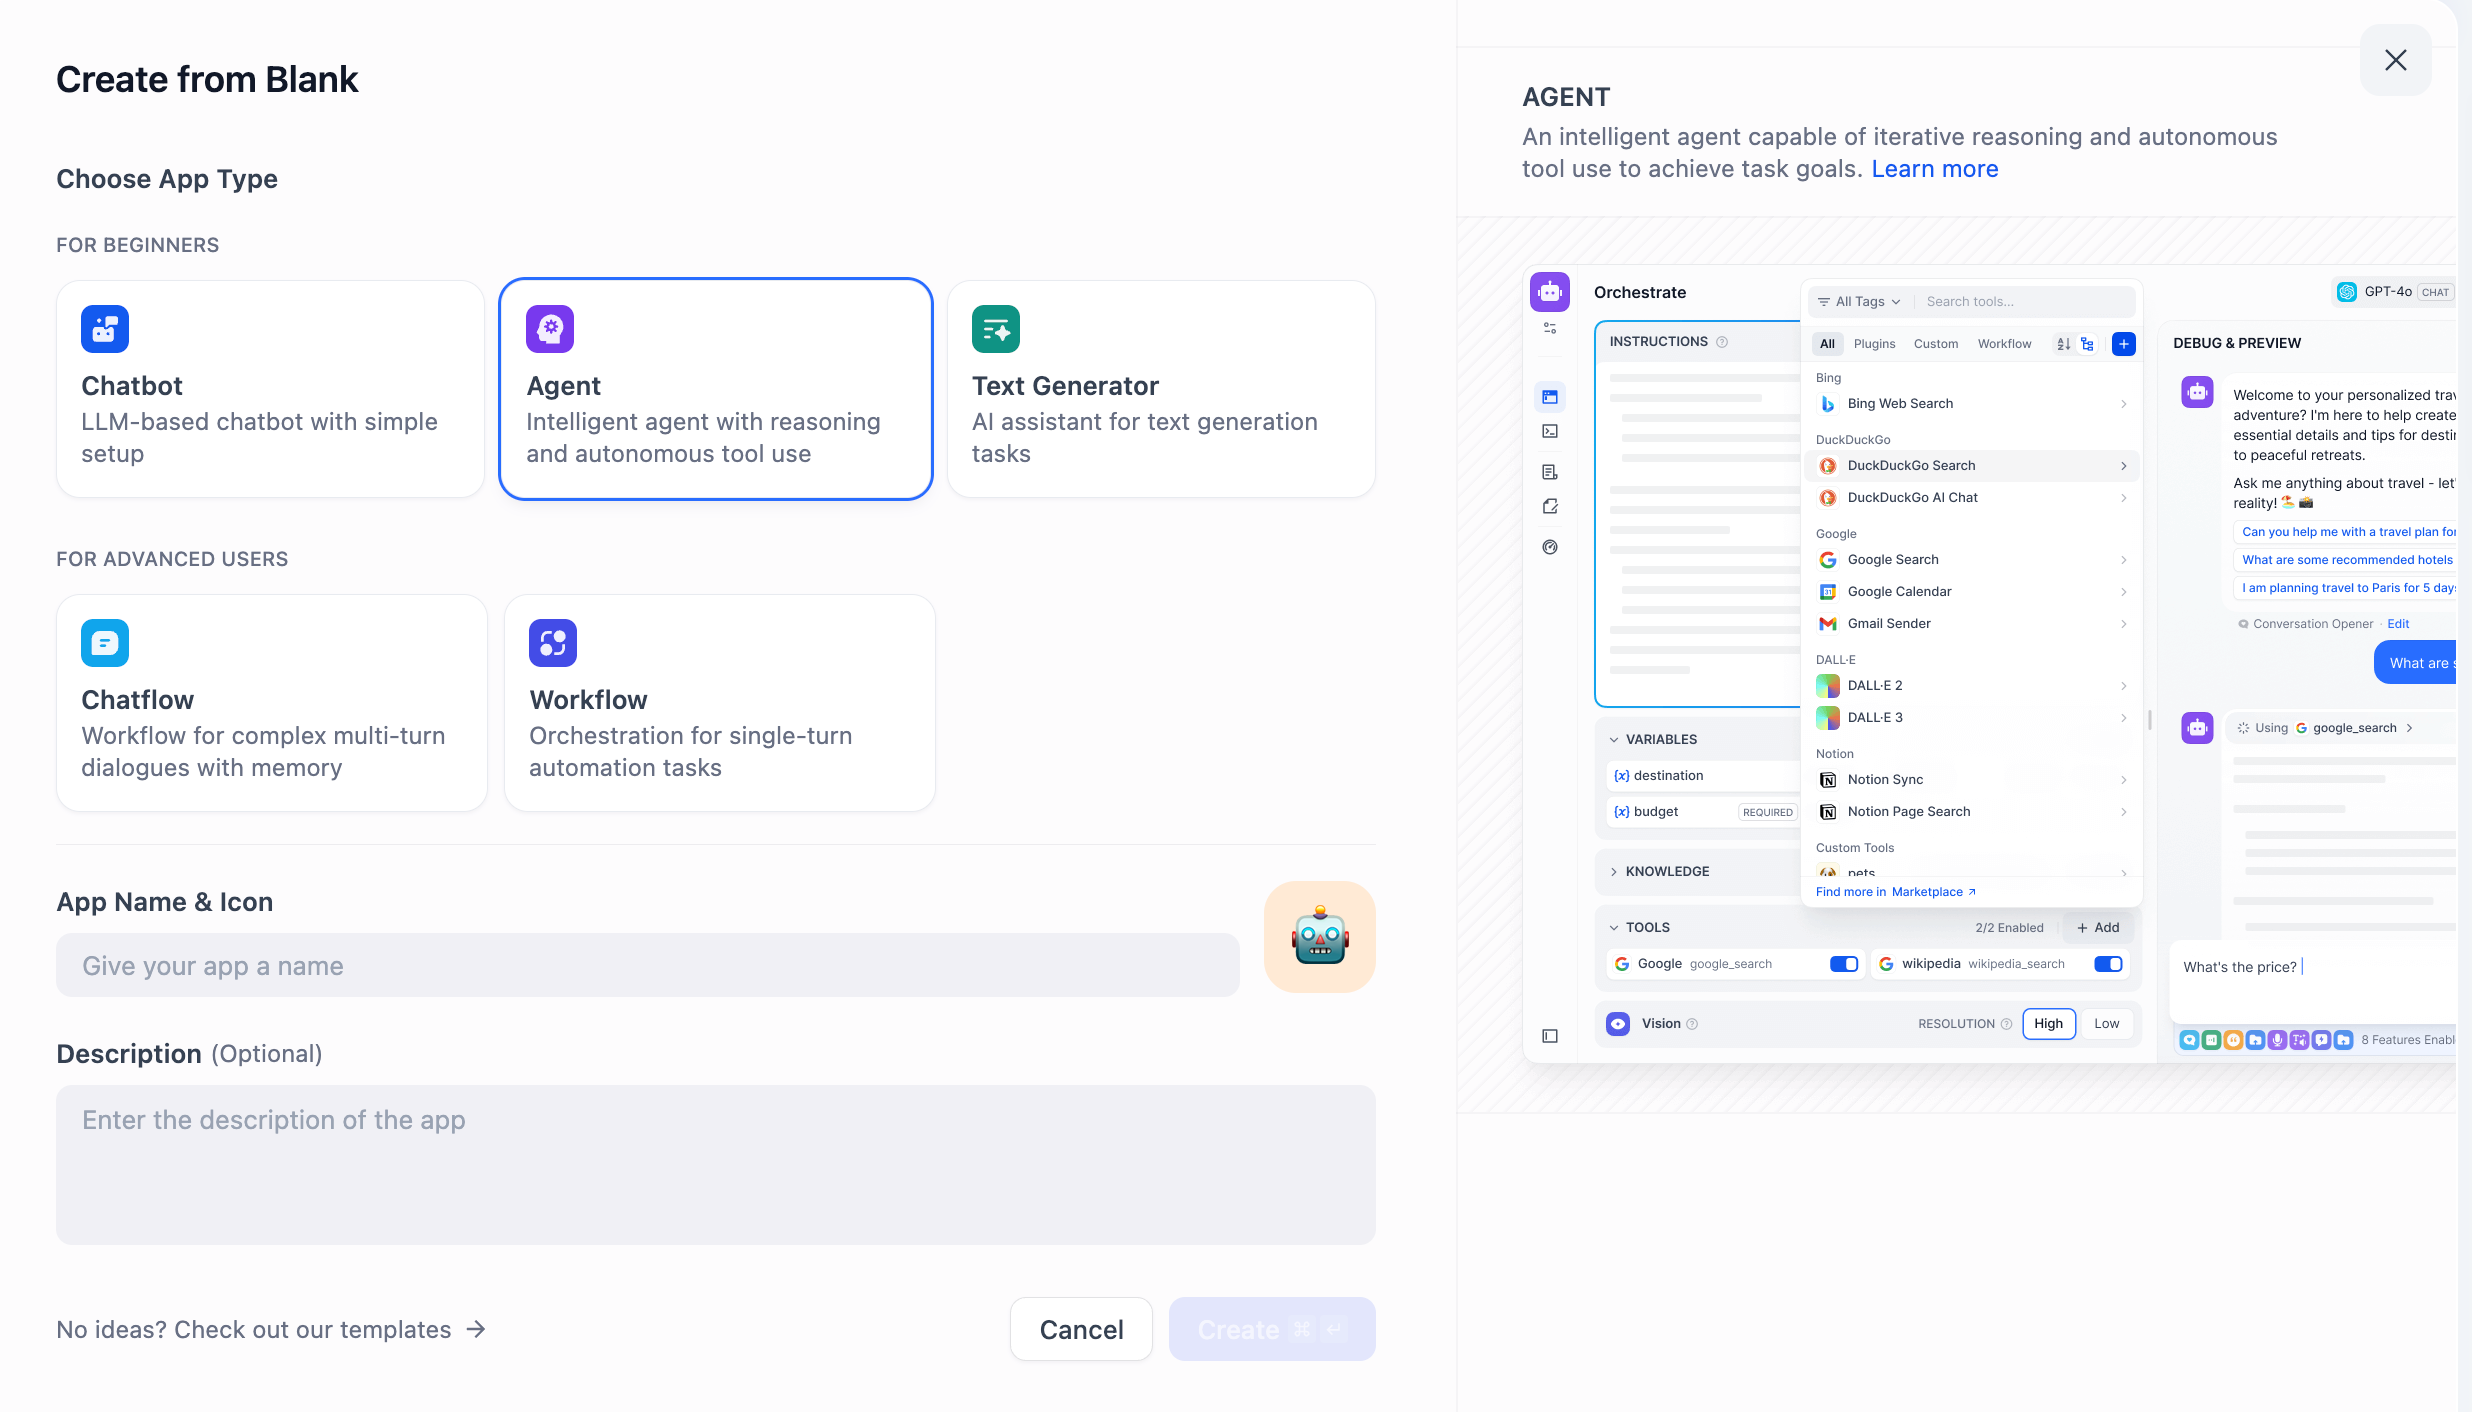
Step 3: Create a Dify Agent Application and Enable MCP SSE Service
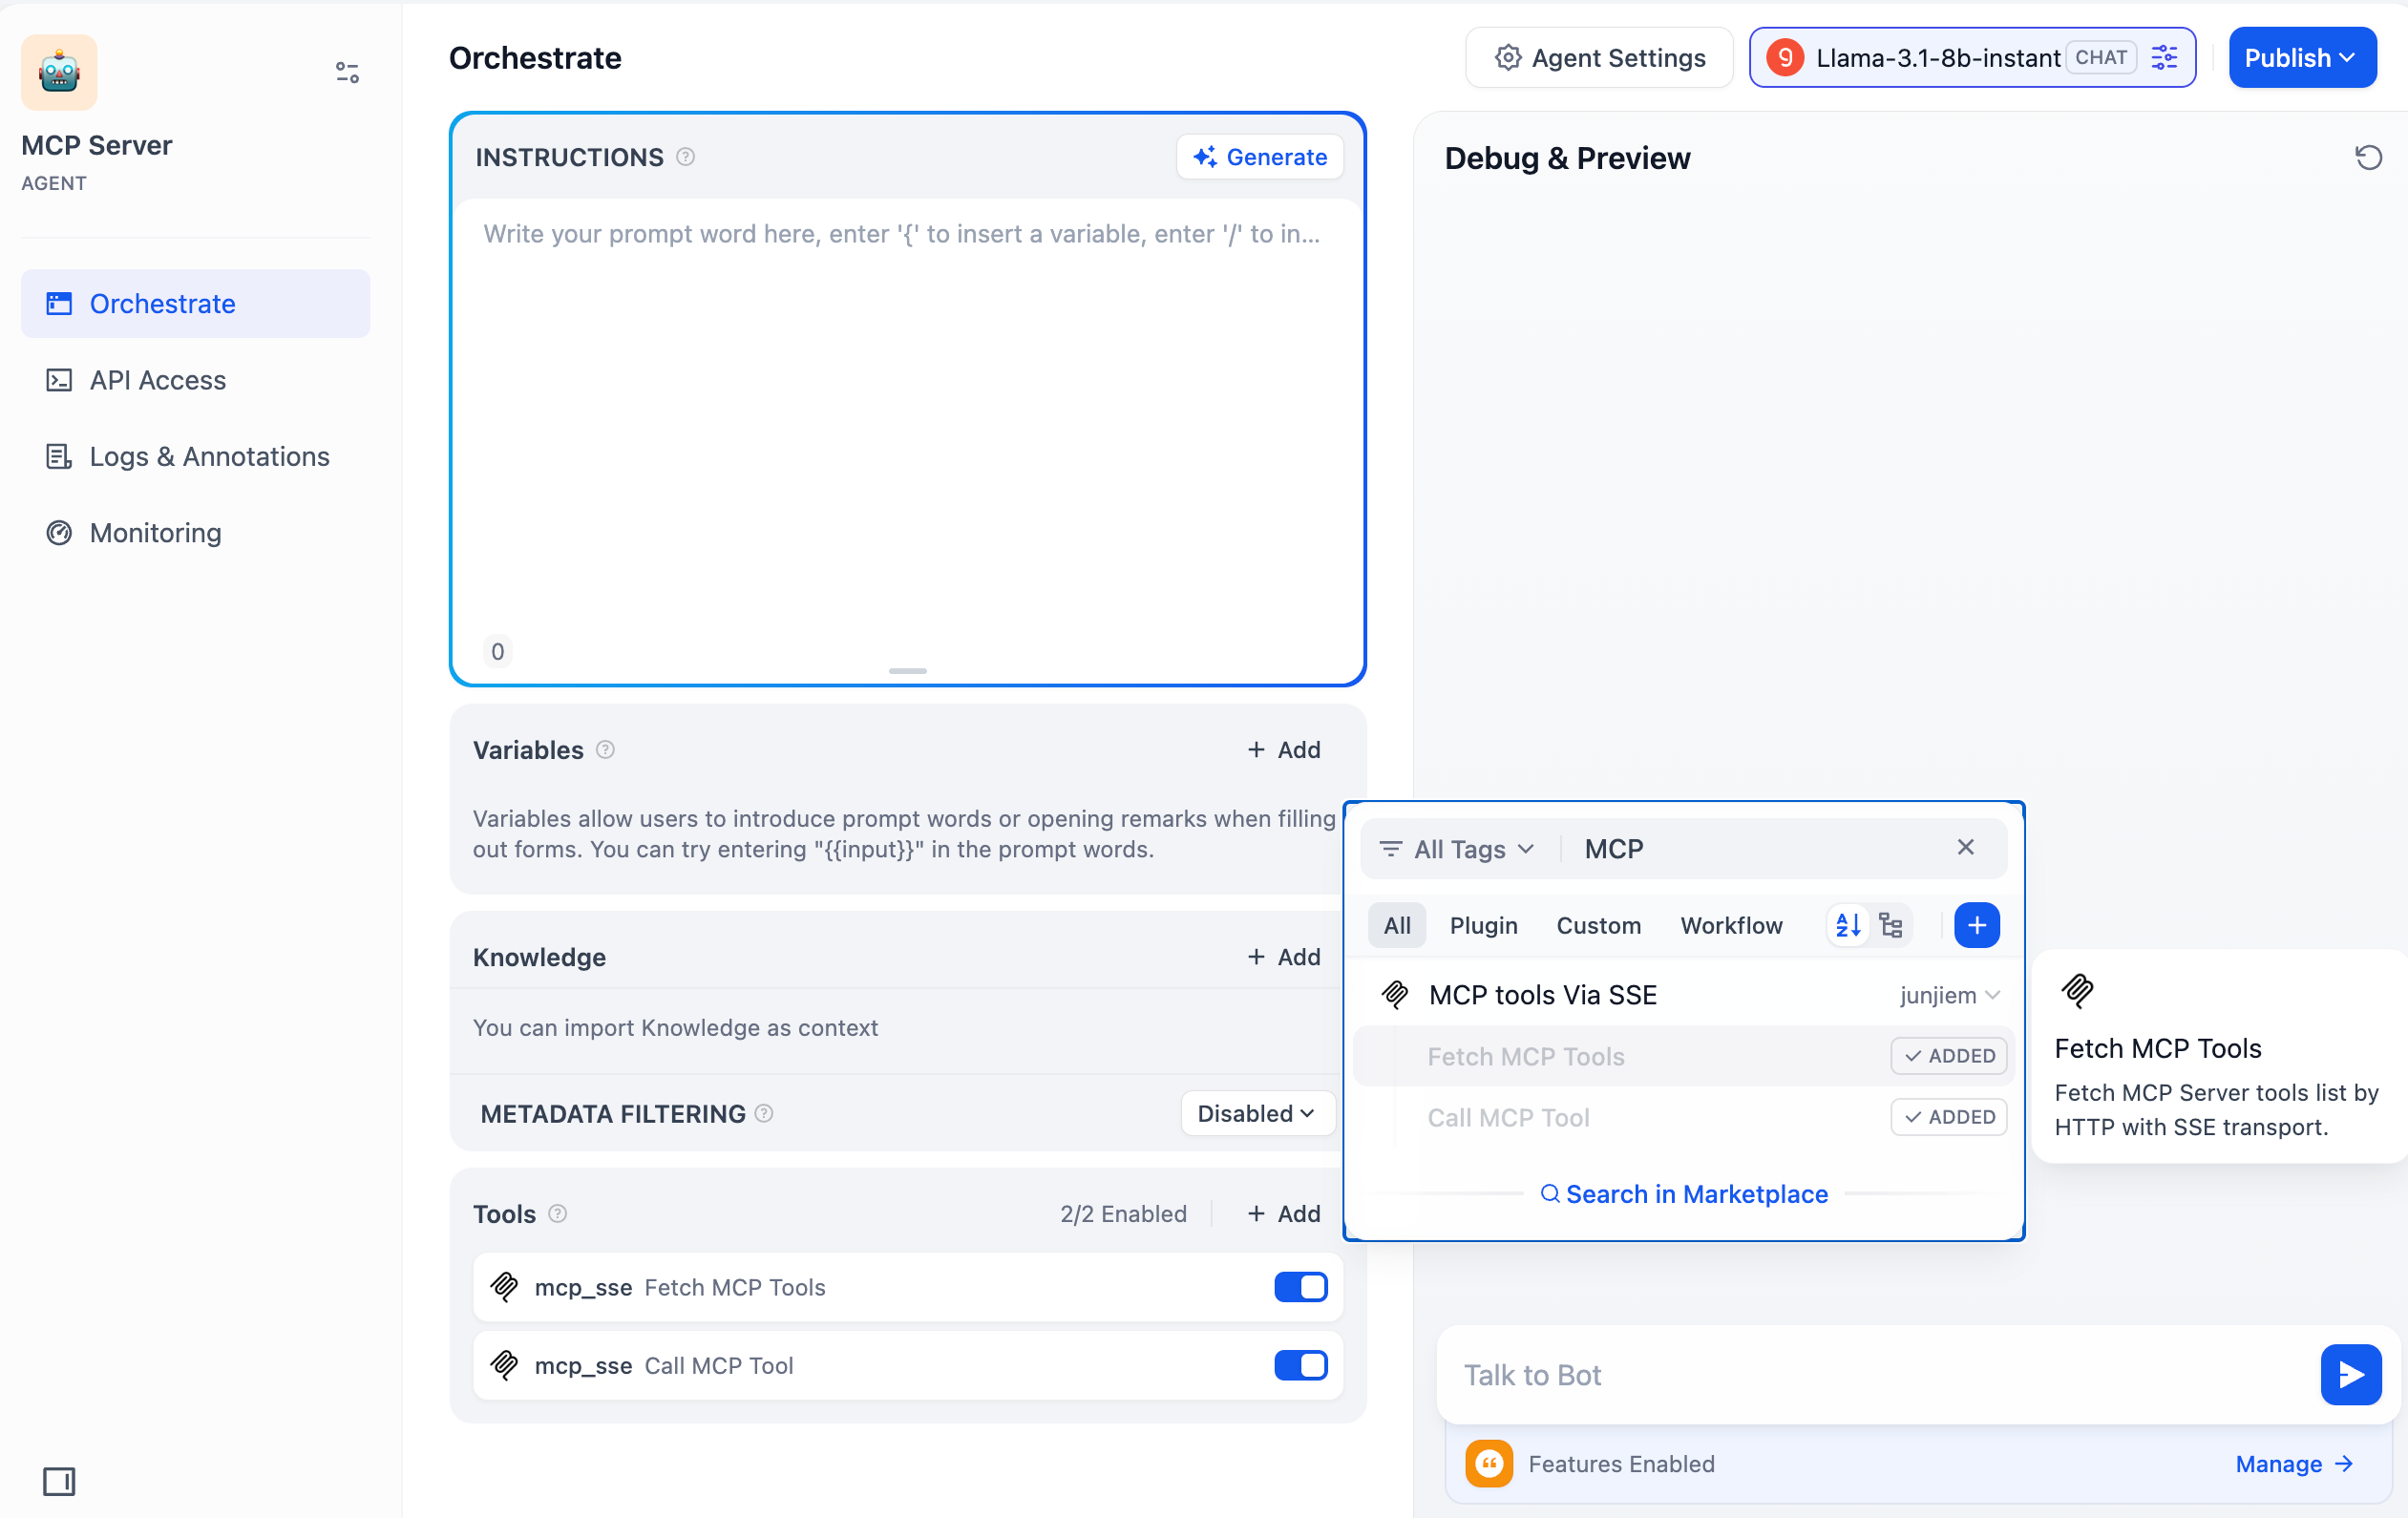
- Create an Agent-type application
- Add MCP tools
Fetch MCP Tools and Call MCP Tool in the application toolbar.
- Configure LLM
deepseek-chat model as an example. You can apply for an API Key from DeepSeek Platform and enter it in “Settings” → “Model Providers” → “DeepSeek”.
If you don’t find the DeepSeek model in your model providers, please go to the Dify plugin marketplace to install the DeepSeek plugin.
Use Case 1: Using MCP Service to Automatically Send a Single Email
After configuration, you can automatically generate email drafts and send them to specified recipients simply by chatting with the Agent.
Simply instruct the Agent via chat to send an email, and it will handle the task using the configured MCP service. After the MCP finishes running, the email will be automatically sent to the recipient.
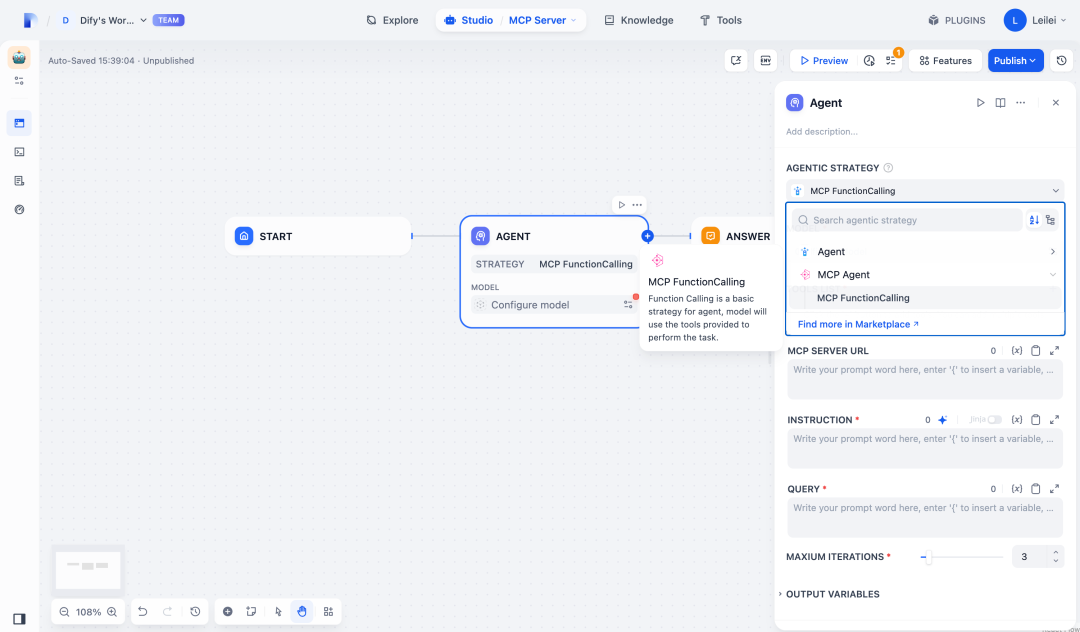
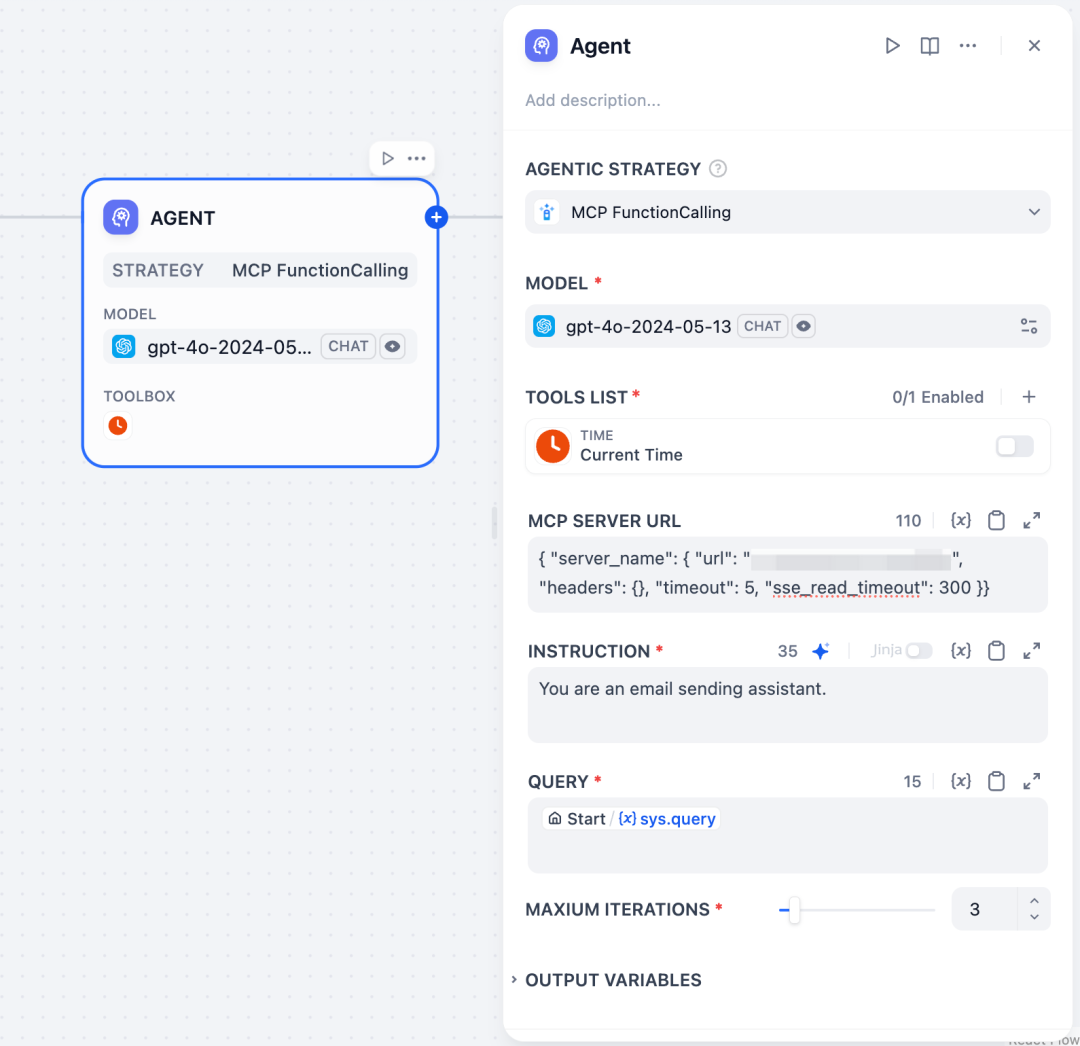
Use Case 2: Configuring MCP Agent Strategy in Workflow
In addition to adding the MCP SSE plugin as a tool to the Agent, you can also use the MCP Agent Strategy plugin in Workflow. After installation, configure it in the corresponding Agent node as follows:
Use the following JSON structure as a template, replacing the url value with the MCP Server address, then copy and paste the complete modified JSON into the MCP SERVER URL configuration box:
Once configured, when the Workflow runs to that Agent node, it can execute tasks using the configured Zapier MCP Server according to the Prompt instructions. As shown below, calling Gmail to send an email:
Edit this page | Report an issue