> ## Documentation Index
> Fetch the complete documentation index at: https://docs.dify.ai/llms.txt
> Use this file to discover all available pages before exploring further.
# ツールプラグイン
> Google Search を例に、初期化からパッケージングまで Dify ツールプラグインを開発します
> このドキュメントは AI によって自動翻訳されています。不正確な部分がある場合は、[英語版](/en/develop-plugin/dev-guides-and-walkthroughs/tool-plugin) を参照してください。
ツールは、Chatflow、Workflow、Agent アプリケーションから呼び出せるサードパーティサービスです。オンライン検索や画像生成などの機能で Dify アプリケーションを拡張します。
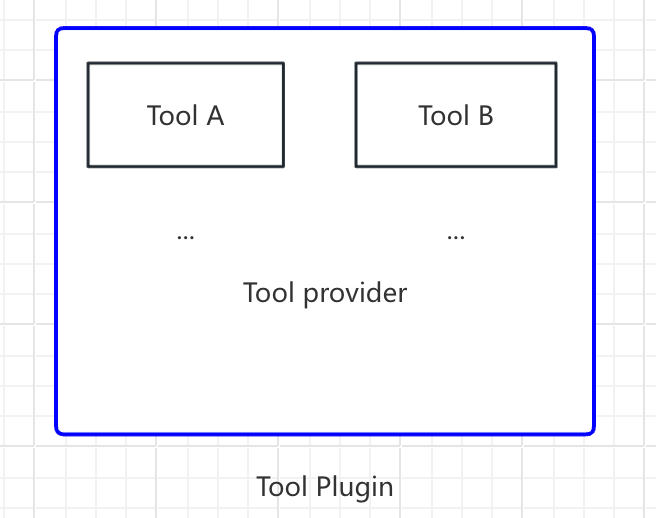
本ガイドにおける **ツールプラグイン** とは、ツールプロバイダーファイル、機能コード、および関連する構造を含む完全なプロジェクトです。ツールプロバイダーは複数のツールをまとめることができ、各ツールはそれぞれ独立した機能を提供します。
```text theme={null}
- Tool Provider
- Tool A
- Tool B
```
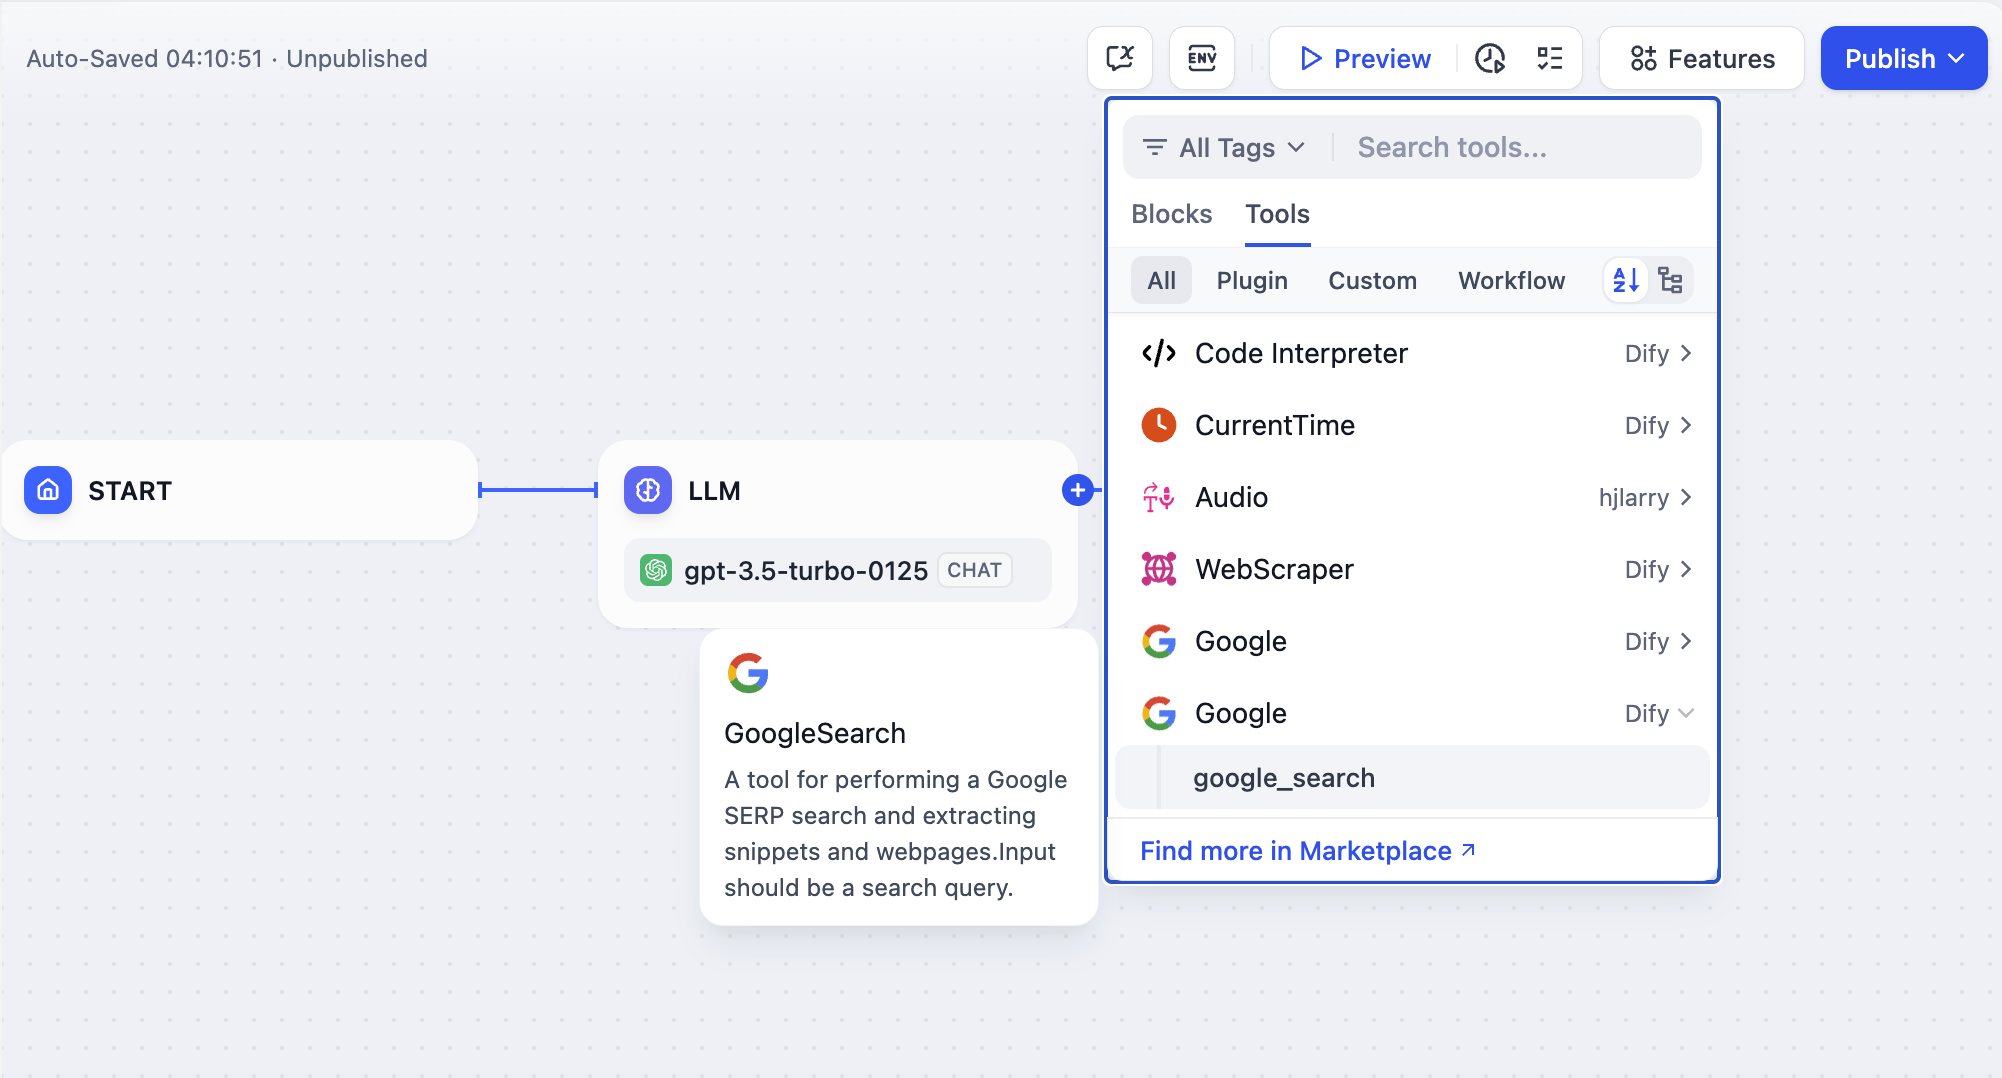
本ガイドでは、Google Search を例にツールプラグインの開発手順を説明します。
## 前提条件
* Dify プラグインスキャフォールディングツール
* Python 環境(バージョン 3.12)
スキャフォールディングツールのセットアップについては、[開発ツールの初期化](/ja/develop-plugin/getting-started/cli) を参照してください。
## 新しいプロジェクトの作成
スキャフォールディングコマンドラインツールを実行して、新しい Dify プラグインプロジェクトを作成します。
```bash theme={null}
./dify-plugin-darwin-arm64 plugin init
```
バイナリファイルを `dify` に名前変更し、`/usr/local/bin` パスにコピーした場合は、以下のコマンドを実行して新しいプラグインプロジェクトを作成できます:
```bash theme={null}
dify plugin init
```
以下の例では `dify` をコマンドとして使用します。問題が発生した場合は、`dify` をコマンドラインツールのパスに置き換えてください。
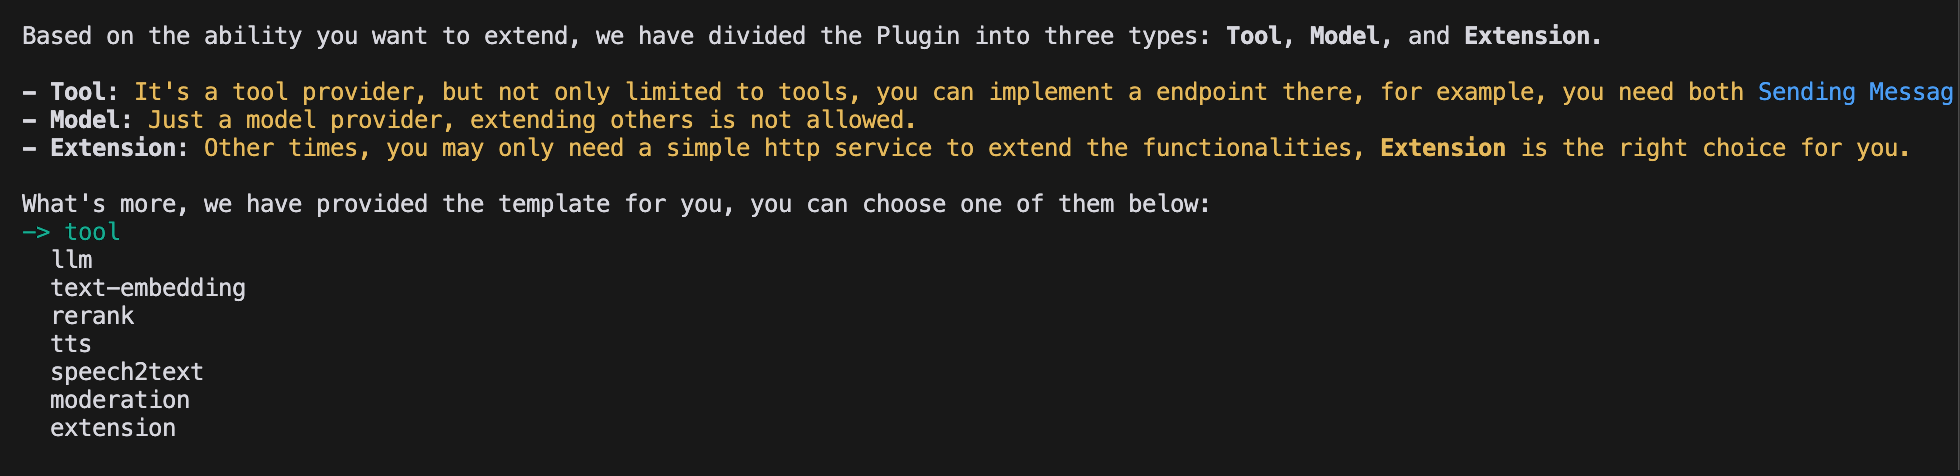
## プラグインタイプとテンプレートの選択
スキャフォールディングツールの各テンプレートは、完全なコードプロジェクトです。この例では `Tool` プラグインを選択します。
すでにプラグイン開発に精通しており、テンプレートが不要な場合は、[一般仕様](/ja/develop-plugin/features-and-specs/plugin-types/general-specifications) ガイドを参照して、任意のタイプのプラグインを構築できます。
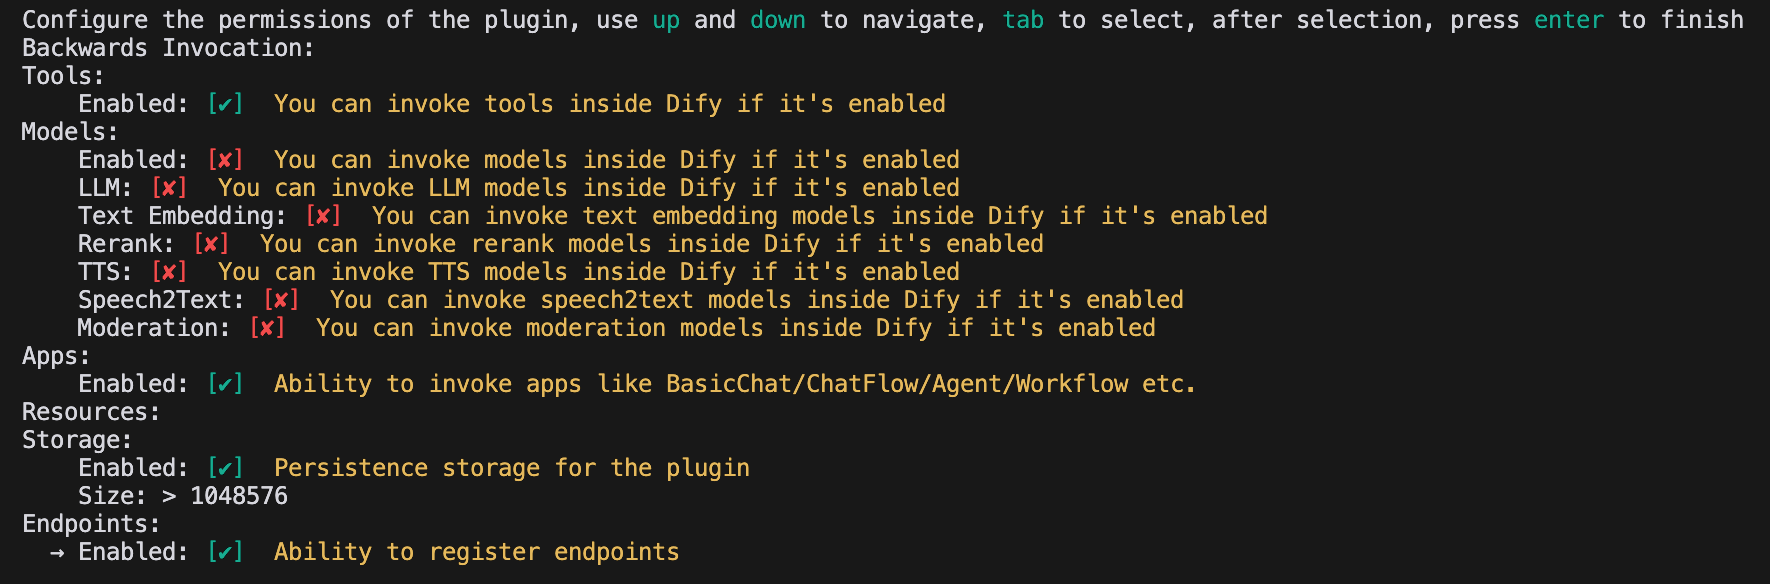
### プラグイン権限の設定
プラグインには、Dify プラットフォームからデータを読み取る権限も必要です。このサンプルプラグインに以下の権限を付与します:
* Tools
* Apps
* 永続ストレージを有効にし、デフォルトサイズを割り当てる
* Endpoints の登録を許可
ターミナルで矢印キーを使用して権限を選択し、Tab キーで権限を付与します。
すべての権限項目をチェックした後、Enter を押してプラグインの作成を完了します。システムが自動的にプラグインプロジェクトコードを生成します。
## ツールプラグインの開発
### 1. ツールプロバイダーファイルの作成
ツールプロバイダーファイルは YAML ファイルで、プラグインの基本設定として機能し、ツールに必要な認証情報を提供します。
プラグインテンプレートプロジェクトの `/provider` ディレクトリに移動し、YAML ファイルを `google.yaml` に名前変更します。このファイルは、ツールプロバイダーの名前、アイコン、作者などの詳細情報を記述し、プラグインのインストール時に表示されます。
サンプルコード:
```yaml theme={null}
identity: # Basic information of the tool provider
author: Your-name # Author
name: google # Name, unique, cannot have the same name as other providers
label: # Label, for frontend display
en_US: Google # English label
zh_Hans: Google # Chinese label
description: # Description, for frontend display
en_US: Google # English description
zh_Hans: Google # Chinese description
icon: icon.svg # Tool icon, needs to be placed in the _assets folder
tags: # Tags, for frontend display
- search
```
ファイルパスが `/tools` ディレクトリにあることを確認してください。完全なパスは以下の通りです:
```yaml theme={null}
plugins:
tools:
- 'google.yaml'
```
`google.yaml` は、プラグインプロジェクト内の絶対パスで参照する必要があります。この例では、プロジェクトのルートディレクトリに配置されています。YAML ファイル内の `identity` には、作者、名前、ラベル、説明、アイコンなど、ツールプロバイダーの基本情報が含まれます。
* アイコンは添付リソースとして、プロジェクトのルートディレクトリの `_assets` フォルダに配置する必要があります。
* タグは、ユーザーがカテゴリ別にプラグインを見つけるのに役立ちます。以下は現在サポートされているすべてのタグです:
```python theme={null}
class ToolLabelEnum(Enum):
SEARCH = 'search'
IMAGE = 'image'
VIDEOS = 'videos'
WEATHER = 'weather'
FINANCE = 'finance'
DESIGN = 'design'
TRAVEL = 'travel'
SOCIAL = 'social'
NEWS = 'news'
MEDICAL = 'medical'
PRODUCTIVITY = 'productivity'
EDUCATION = 'education'
BUSINESS = 'business'
ENTERTAINMENT = 'entertainment'
UTILITIES = 'utilities'
OTHER = 'other'
```
### 2. サードパーティサービス認証情報の追加
この例では、利便性のためサードパーティサービス SerpApi が提供する Google Search API を使用します。SerpApi は API Key が必要なため、YAML ファイルに `credentials_for_provider` フィールドを追加します。
完全なコード:
```yaml theme={null}
identity:
author: Dify
name: google
label:
en_US: Google
zh_Hans: Google
pt_BR: Google
description:
en_US: Google
zh_Hans: GoogleSearch
pt_BR: Google
icon: icon.svg
tags:
- search
credentials_for_provider: #Add credentials_for_provider field
serpapi_api_key:
type: secret-input
required: true
label:
en_US: SerpApi API key
zh_Hans: SerpApi API key
placeholder:
en_US: Please input your SerpApi API key
zh_Hans: Please enter your SerpApi API key
help:
en_US: Get your SerpApi API key from SerpApi
zh_Hans: Get your SerpApi API key from SerpApi
url: https://serpapi.com/manage-api-key
tools:
- tools/google_search.yaml
extra:
python:
source: google.py
```
* `credentials_for_provider` のサブレベル構造は、[一般仕様](/ja/develop-plugin/features-and-specs/plugin-types/general-specifications) の要件を満たす必要があります。
* プロバイダーに含まれるツールを指定します。この例では、`tools/google_search.yaml` という 1 つのファイルのみを含みます。
* プロバイダーは基本情報のほかにコードロジックが必要なため、その実装ファイルを指定します。この例では `google.py` を使用しますが、ここでは実装せず、先に `google_search` ツールのコードを記述します。
### 3. ツールYAMLファイルの記入
ツールプラグインは複数のツールを含むことができ、各ツールはそれぞれの YAML ファイルで基本情報、パラメータ、出力を記述します。
引き続き `GoogleSearch` ツールを例として、`/tools` フォルダに新しい `google_search.yaml` ファイルを作成します。
```yaml theme={null}
identity:
name: google_search
author: Dify
label:
en_US: GoogleSearch
zh_Hans: Google Search
pt_BR: GoogleSearch
description:
human:
en_US: A tool for performing a Google SERP search and extracting snippets and webpages. Input should be a search query.
zh_Hans: A tool for performing a Google SERP search and extracting snippets and webpages. Input should be a search query.
pt_BR: A tool for performing a Google SERP search and extracting snippets and webpages. Input should be a search query.
llm: A tool for performing a Google SERP search and extracting snippets and webpages. Input should be a search query.
parameters:
- name: query
type: string
required: true
label:
en_US: Query string
zh_Hans: Query string
pt_BR: Query string
human_description:
en_US: used for searching
zh_Hans: used for searching web content
pt_BR: used for searching
llm_description: key words for searching
form: llm
extra:
python:
source: tools/google_search.py
```
* **`identity`**:名前、作者、ラベル、説明などのツールの基本情報。
* **`parameters`**:パラメータリスト。
* **`name`**(必須):パラメータ名。ツールのパラメータ内で一意である必要があります。
* **`type`**(必須):パラメータタイプ。`string`、`number`、`boolean`、`select`、`secret-input` のいずれかで、それぞれ文字列、数値、ブール値、ドロップダウン、暗号化入力ボックスとして表示されます。機密情報には `secret-input` を使用してください。
* **`label`**(必須):パラメータラベル。フロントエンドに表示されます。
* **`form`**(必須):フォームタイプ。`llm` または `form` のいずれか。
* Agent アプリケーションでは、`llm` はパラメータを LLM が自動的に推論することを意味し、`form` はツールを使用する前にパラメータを事前設定できることを意味します。
* Workflow アプリケーションでは、`llm` と `form` の両方のパラメータをフロントエンドで入力しますが、`llm` パラメータはツールノードの入力変数として使用されます。
* **`required`**(任意):パラメータが必須かどうか。
* `llm` モードでは、必須パラメータは Agent が推論する必要があります。
* `form` モードでは、必須パラメータは会話開始前にフロントエンドで入力する必要があります。
* **`options`**(任意):パラメータオプション。
* `llm` モードでは、Dify はすべてのオプションを LLM に渡し、LLM がそれらに基づいて推論できます。
* `form` モードでは、`type` が `select` の場合にフロントエンドがオプションを表示します。
* **`default`**(任意):デフォルト値。
* **`min`**(任意):最小値。パラメータタイプが `number` の場合に適用されます。
* **`max`**(任意):最大値。パラメータタイプが `number` の場合に適用されます。
* **`human_description`**(任意):フロントエンドに表示される説明。複数言語をサポートします。
* **`placeholder`**(任意):入力フィールドのヒントテキスト。フォームタイプが `form` でパラメータタイプが `string`、`number`、`secret-input` の場合に適用されます。複数言語をサポートします。
* **`llm_description`**(任意):LLM に渡される説明。LLM がパラメータを理解できるよう、できるだけ詳細に記述してください。
### 4. ツールコードの記述
ツールの設定が完了したら、ツールのロジックを実装するコードを記述します。`/tools` ディレクトリに `google_search.py` を作成し、以下の内容を記述します:
```python theme={null}
from collections.abc import Generator
from typing import Any
import requests
from dify_plugin import Tool
from dify_plugin.entities.tool import ToolInvokeMessage
SERP_API_URL = "https://serpapi.com/search"
class GoogleSearchTool(Tool):
def _parse_response(self, response: dict) -> dict:
result = {}
if "knowledge_graph" in response:
result["title"] = response["knowledge_graph"].get("title", "")
result["description"] = response["knowledge_graph"].get("description", "")
if "organic_results" in response:
result["organic_results"] = [
{
"title": item.get("title", ""),
"link": item.get("link", ""),
"snippet": item.get("snippet", ""),
}
for item in response["organic_results"]
]
return result
def _invoke(self, tool_parameters: dict[str, Any]) -> Generator[ToolInvokeMessage]:
params = {
"api_key": self.runtime.credentials["serpapi_api_key"],
"q": tool_parameters["query"],
"engine": "google",
"google_domain": "google.com",
"gl": "us",
"hl": "en",
}
response = requests.get(url=SERP_API_URL, params=params, timeout=5)
response.raise_for_status()
valuable_res = self._parse_response(response.json())
yield self.create_json_message(valuable_res)
```
このコードは `serpapi` にリクエストを送信し、`self.create_json_message` を使用してフォーマットされた JSON データを返します。返却データタイプの詳細については、[プラグインのリモートデバッグ](/ja/develop-plugin/features-and-specs/plugin-types/remote-debug-a-plugin) と [永続ストレージ KV](/ja/develop-plugin/features-and-specs/plugin-types/persistent-storage-kv) を参照してください。
### 5. ツールプロバイダーコードの完成
最後に、プロバイダーの認証情報検証ロジックを実装します。検証が失敗した場合、コードは `ToolProviderCredentialValidationError` 例外を発生させます。検証が成功すると、`google_search` ツールサービスが正しくリクエストされます。
`/provider` ディレクトリに `google.py` ファイルを作成し、以下の内容を記述します:
```python theme={null}
from typing import Any
from dify_plugin import ToolProvider
from dify_plugin.errors.tool import ToolProviderCredentialValidationError
from tools.google_search import GoogleSearchTool
class GoogleProvider(ToolProvider):
def _validate_credentials(self, credentials: dict[str, Any]) -> None:
try:
for _ in GoogleSearchTool.from_credentials(credentials).invoke(
tool_parameters={"query": "test", "result_type": "link"},
):
pass
except Exception as e:
raise ToolProviderCredentialValidationError(str(e))
```
## プラグインのデバッグ
開発が完了したら、プラグインが正常に動作するかどうかをテストします。Dify はリモートデバッグを提供しており、テスト環境でプラグインの機能を素早く検証できます。
[プラグイン管理](https://cloud.dify.ai/plugins) ページに移動して、リモートサーバーアドレスとデバッグキーを取得します。
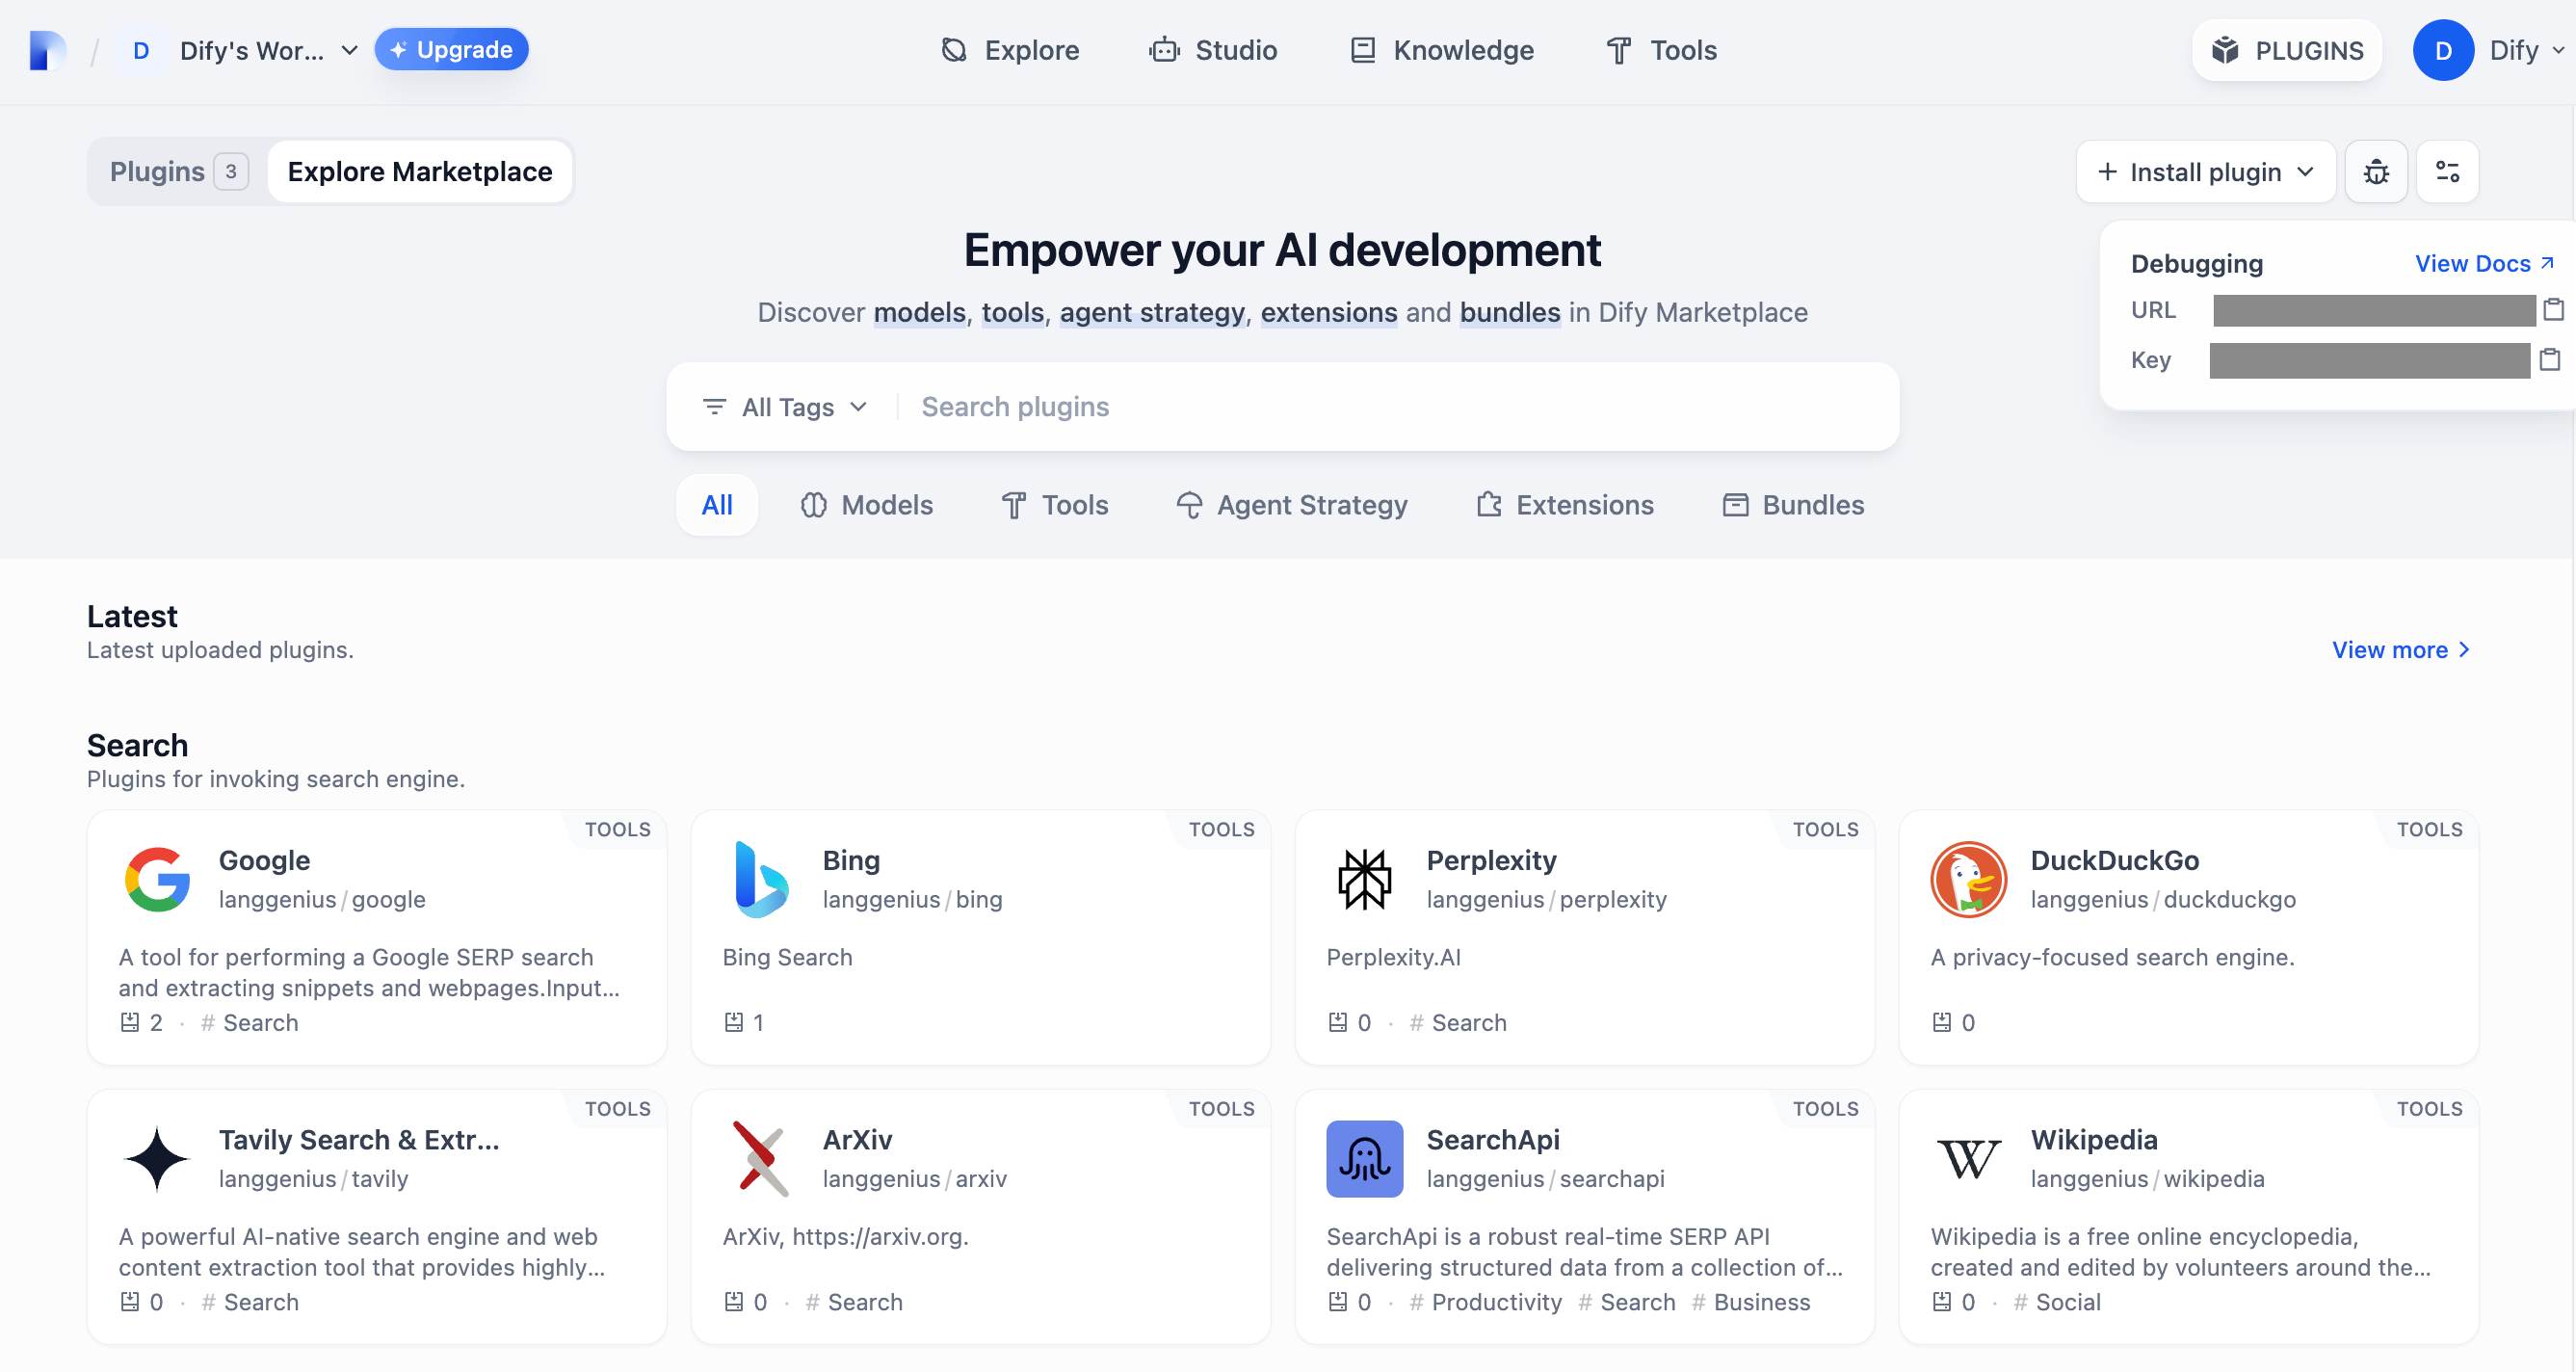
プラグインプロジェクトに戻り、`.env.example` ファイルをコピーして `.env` に名前変更し、リモートサーバーアドレスとデバッグキーを入力します。
`.env`ファイル:
```bash theme={null}
INSTALL_METHOD=remote
REMOTE_INSTALL_URL=debug.dify.ai:5003
REMOTE_INSTALL_KEY=********-****-****-****-************
```
`python -m main` を実行してプラグインを起動します。**プラグイン** ページで、プラグインがワークスペースにインストールされていることを確認でき、チームの他のメンバーもアクセスできます。

## プラグインのパッケージング(オプション)
プラグインが正常に動作したら、以下のコマンドでプラグインをパッケージ化して名前を付けます。実行すると、現在のフォルダに `google.difypkg` ファイルが生成されます。これが最終的なプラグインパッケージです。
```bash theme={null}
# Replace ./google with the actual path of the plugin project
dify plugin package ./google
```
おめでとうございます。ツールプラグインの開発、デバッグ、パッケージングが完了しました。
## プラグインの公開(オプション)
プラグインを Dify マーケットプレイスに公開するには、プラグインが [Dify マーケットプレイスへの公開](/ja/develop-plugin/publishing/marketplace-listing/release-to-dify-marketplace) の仕様に従っていることを確認してください。レビューに合格すると、コードはメインブランチにマージされ、自動的に [Dify マーケットプレイス](https://marketplace.dify.ai/) で公開されます。
全体の手順については、[公開の概要](/ja/develop-plugin/publishing/marketplace-listing/release-overview) を参照してください。
## さらに探索
### クイックスタート
* [拡張プラグインの開発](/ja/develop-plugin/dev-guides-and-walkthroughs/endpoint)
* [モデルプラグインの開発](/ja/develop-plugin/dev-guides-and-walkthroughs/creating-new-model-provider)
* [バンドルプラグイン:複数のプラグインのパッケージング](/ja/develop-plugin/features-and-specs/advanced-development/bundle)
### プラグインインターフェースドキュメント
* [一般仕様](/ja/develop-plugin/features-and-specs/plugin-types/general-specifications):マニフェスト構造とツール仕様。
* [Endpoint](/ja/develop-plugin/dev-guides-and-walkthroughs/endpoint):詳細な Endpoint の定義。
* [リバース呼び出し](/ja/develop-plugin/features-and-specs/advanced-development/reverse-invocation):Dify 機能のリバース呼び出し。
* [モデルスキーマ](/ja/develop-plugin/features-and-specs/plugin-types/model-schema):モデル。
* [Agent プラグイン](/ja/develop-plugin/features-and-specs/advanced-development/reverse-invocation):Agent 戦略の拡張。
## 次のステップ
* [プラグインのリモートデバッグ](/ja/develop-plugin/features-and-specs/plugin-types/remote-debug-a-plugin):より高度なデバッグテクニックを学びます。
* [永続ストレージ](/ja/develop-plugin/features-and-specs/plugin-types/persistent-storage-kv):プラグインでデータストレージを使用します。
* [Slack Bot プラグイン開発例](/ja/develop-plugin/dev-guides-and-walkthroughs/develop-a-slack-bot-plugin):より複雑なプラグイン開発ケース。
* [ツールプラグイン](/ja/develop-plugin/features-and-specs/plugin-types/tool):ツールプラグインの高度な機能。