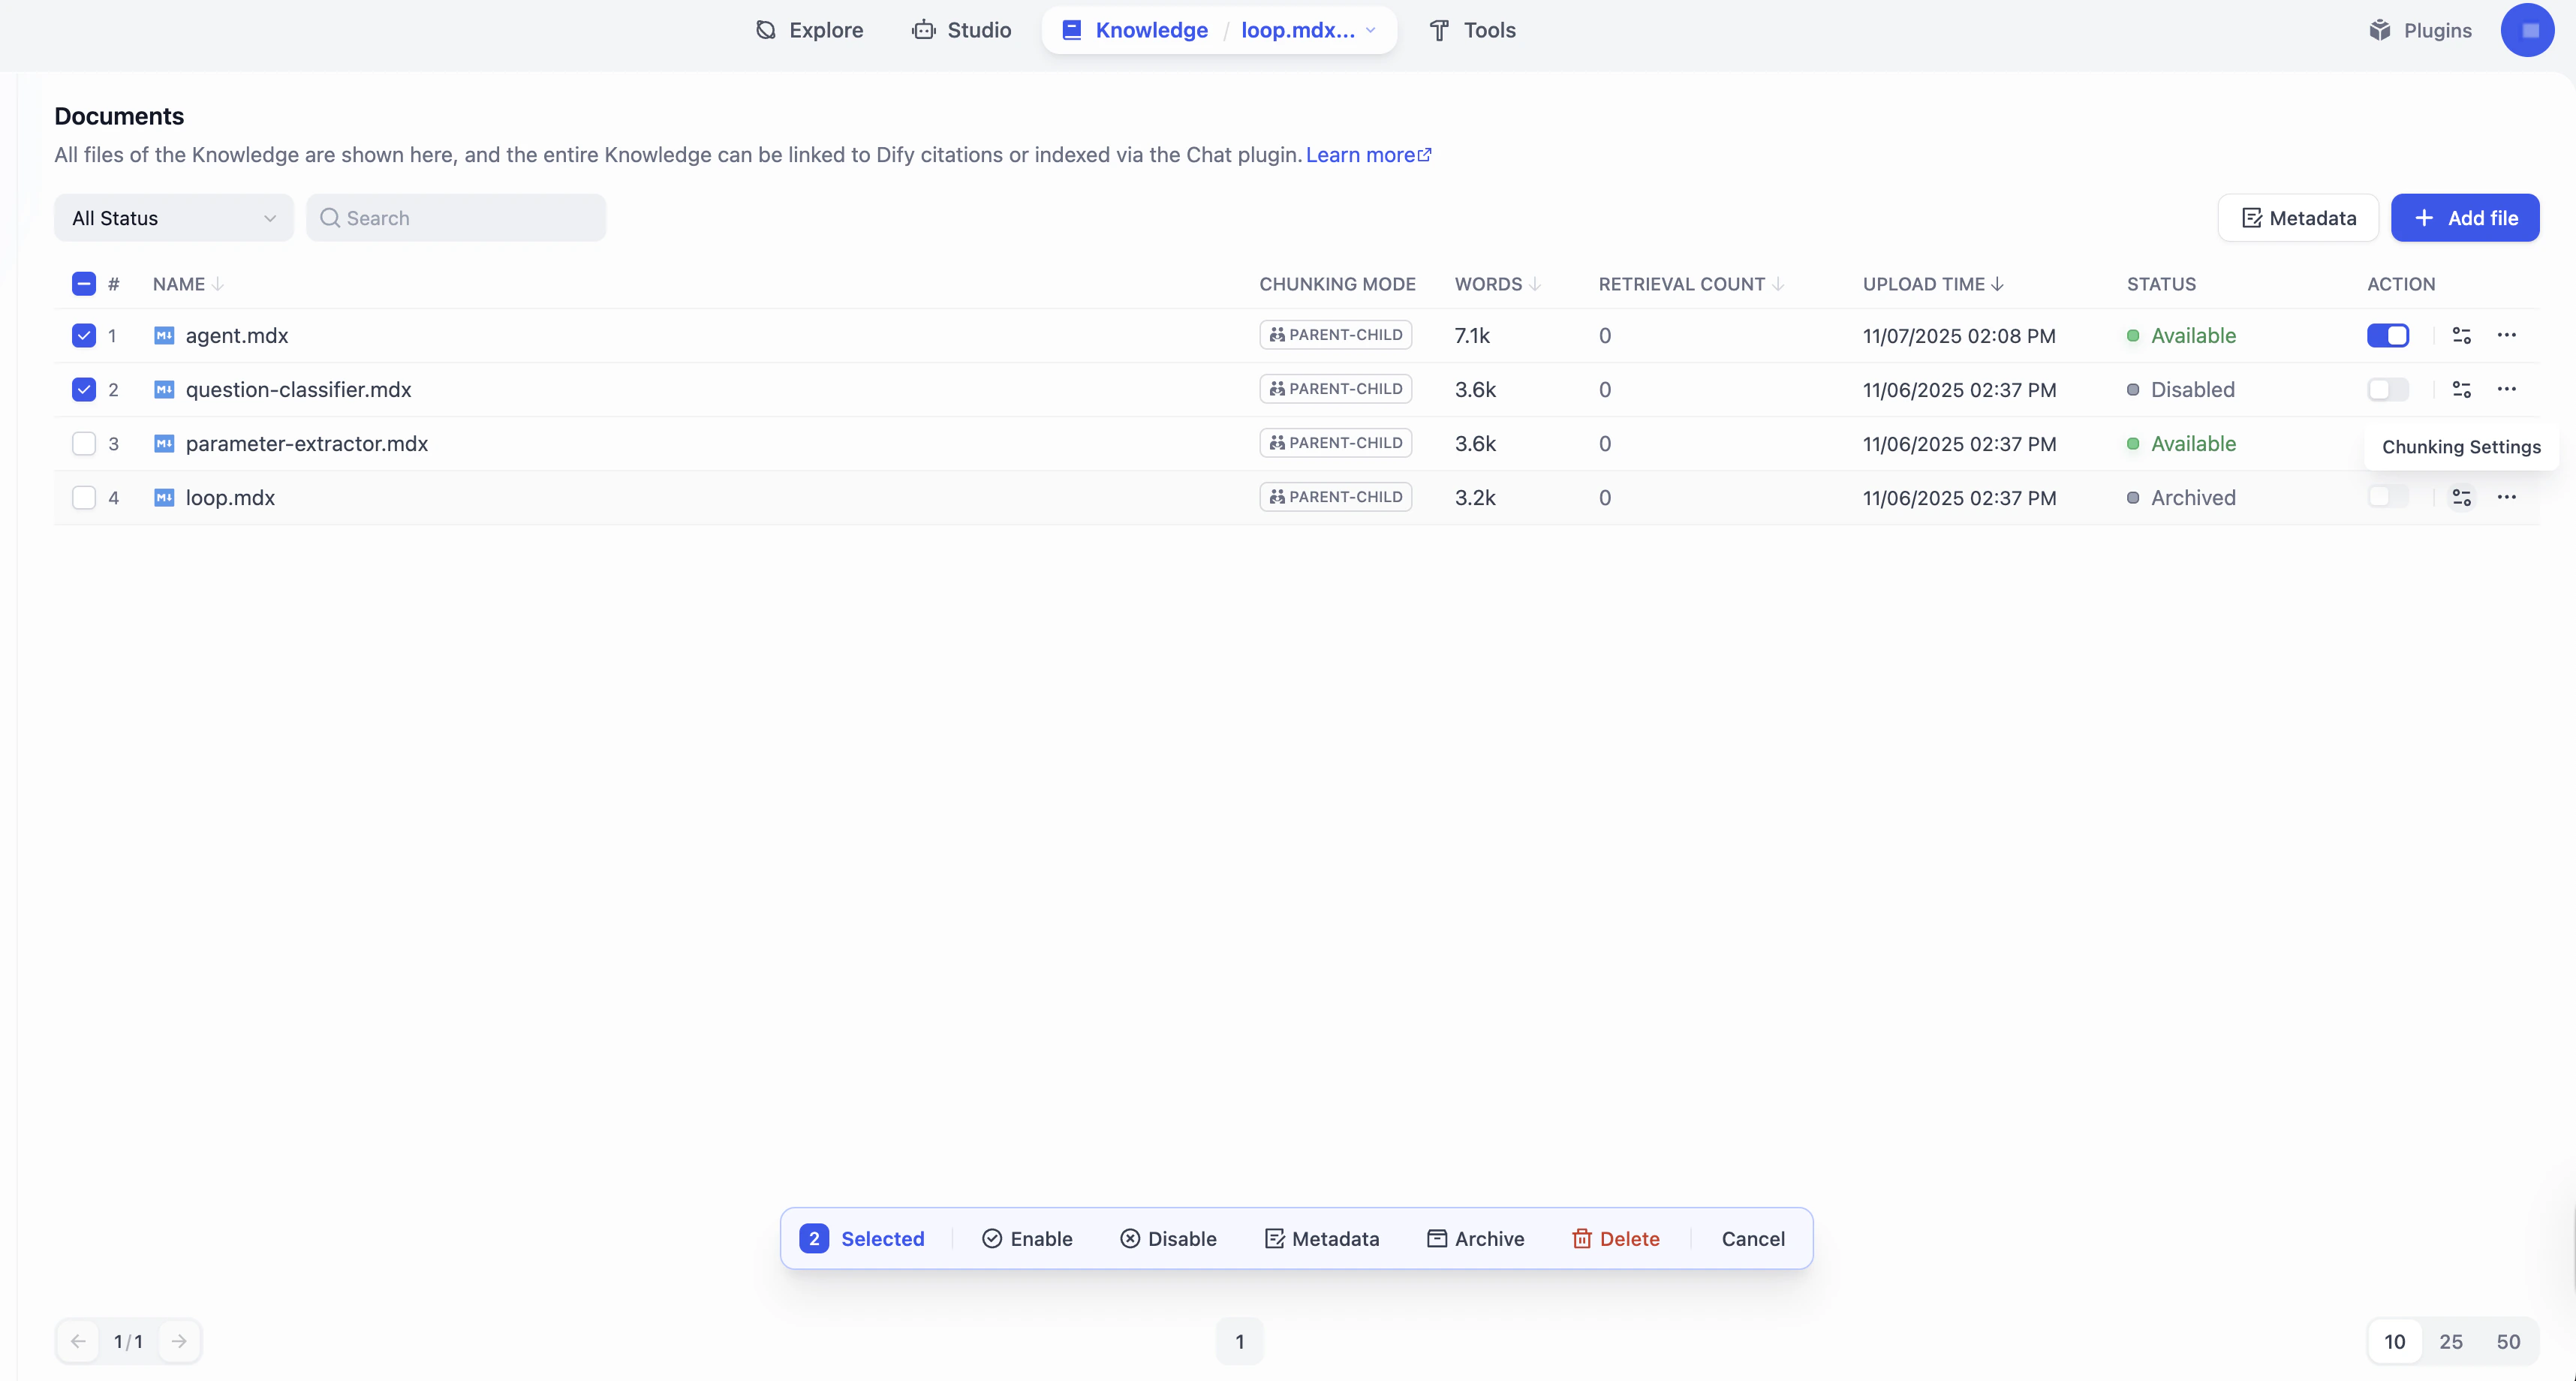
Manage Documents
In a knowledge base, each imported item—whether a local file, a Notion page, or a web page—becomes a document.
From the document list, you can view and manage all these documents to keep your knowledge accurate, relevant, and up-to-date.
Click the knowledge base name at the top to quickly switch between knowledge bases.
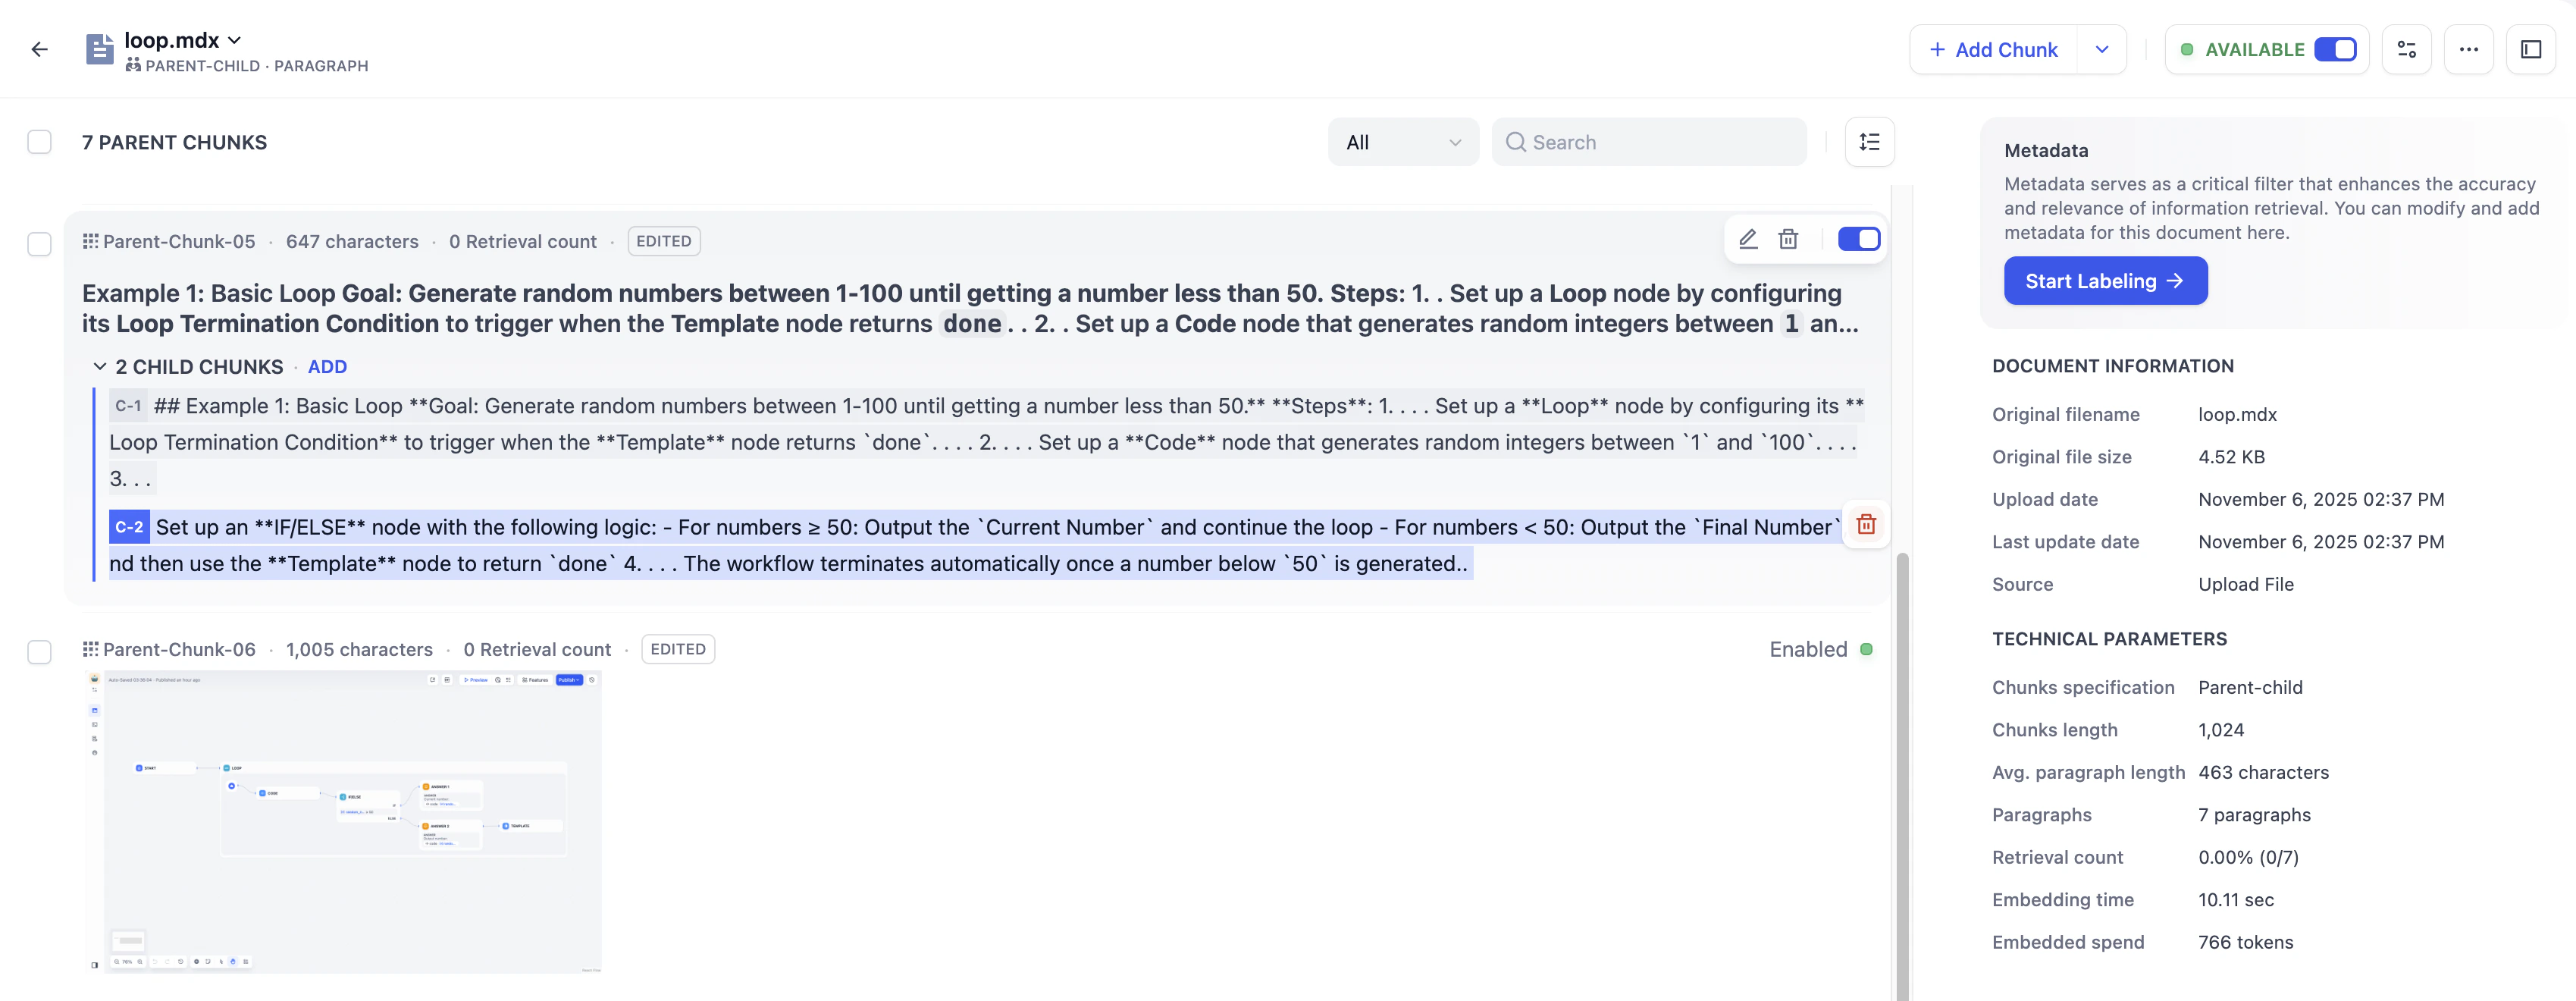
Manage Chunks
According to its chunk settings, every document is split into content chunks—the basic units for retrieval.
From the chunk list within a document, you can view and manage all its chunks to improve the retrieval efficiency and accuracy.
Click the document name in the upper-left corner to quickly switch between documents.
Best Practices
Check Chunk Quality
After a document is chunked, carefully review each chunk to ensure it’s semantically complete and appropriately sized for optimal retrieval accuracy and response relevance.
Common issues to watch for:
-
Chunks are too short—may lack sufficient context, leading to semantic loss and inaccurate answers.
-
Chunks are too long—may include irrelevant information, introducing semantic noise and lowering retrieval precision.
-
Chunks are semantically incomplete—caused by forced chunking that cuts through sentences or paragraphs, resulting in missing or misleading content during retrieval.
Use Child Chunks as Retrieval Hooks for Parent Chunks
For documents chunked with Parent-child mode, the system searches across child chunks but returns the parent chunks. Since editing a child chunk does not update its parent, you can treat child chunks as semantic tags or retrieval hints for their parent chunks.
To do this, rewrite child chunks into keywords, summaries, or common user queries. For example, if a parent chunk covers technical “LED Status Indicators”, you could rephrase its child chunks as:
-
blinking light, won’t turn on, red light, connection error, frozen (keywords)
-
Guide to interpreting LED colors and troubleshooting hardware power or pairing issues (summaries)
-
What does a solid red light mean? (queries)
Use Summaries to Bridge Query-Content Gaps
While high-quality indexing enables semantic search, raw chunks can still be hard to retrieve when they are too specific, noisy, or structurally complex to align well with user queries.
Summaries bridge this gap by providing a condensed semantic layer that makes the chunk’s core intent explicit.
Use summaries when:
-
User queries differ from document language: For technical documentation written formally, add summaries in the way users actually ask questions.
-
Concepts are implicit or buried in details: Add high-level summaries that surface the core concepts and intent, so the chunk can be matched without relying on small details scattered across the text.
-
Raw text is non-textual: When a chunk is primarily code, tables, logs, transcripts, or otherwise hard to match semantically, add descriptive summaries that clearly label what the chunk contains.
-
Related chunks should be retrieved together: Apply identical summaries to a series of related chunks to enable grouped retrieval. This semantic glue allows multiple parts of a topic to be retrieved together, providing richer context.
The number of returned related chunks is subject to the Top K limit defined in the retrieval settings.